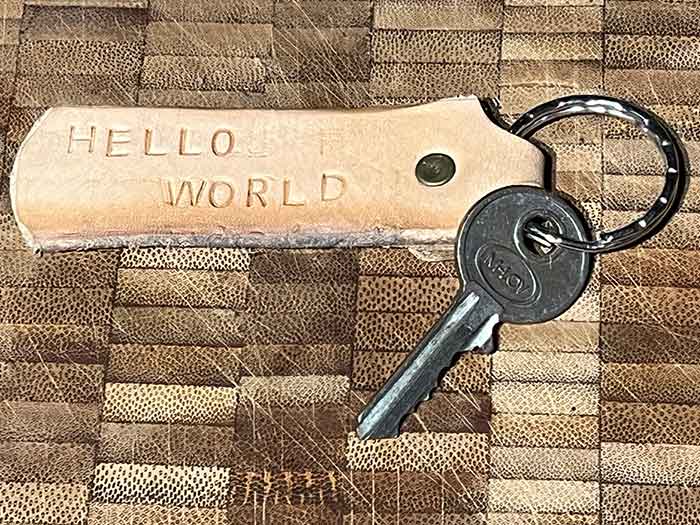
Leather keychain
duration: 15 - 30 minutes
age: from 7 years
A leather keychain with text
tools
- Hobby knife
- Cutting ruler
- Punches (semi circles)
- Letter punches
- Hammer
- Cutting mat
- Anvil
- Marker
- Beveling tool (optional)
- Burnishing tool (optional)
materials
- Leather (thick)
- Rivet
- Keychain ring
downloads
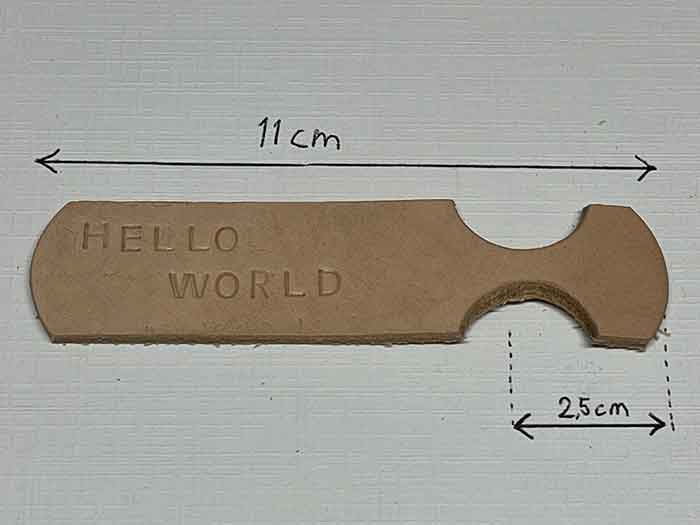
step 1 - Cut the leather
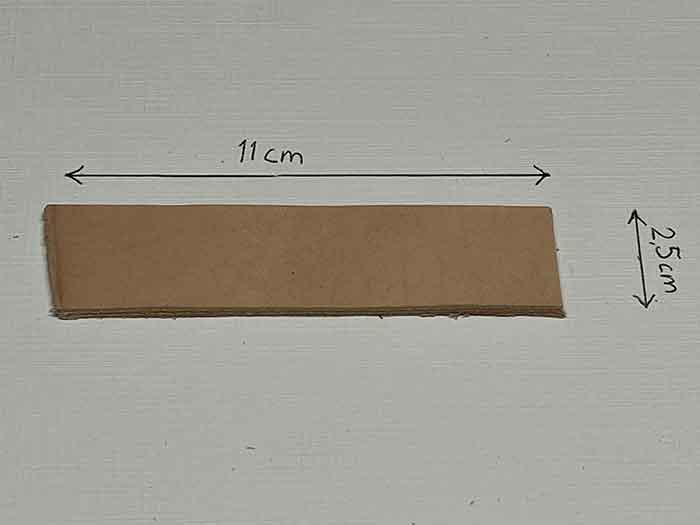
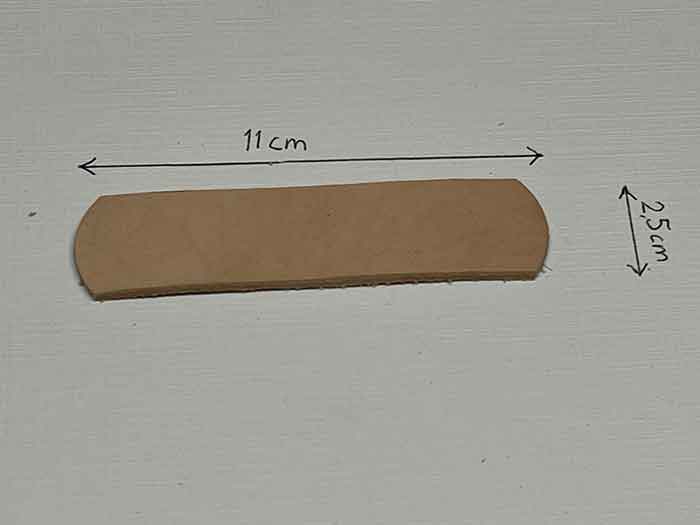
- Use the hobbyknife and the ruler to cut a strip of leather. About 2.5cm (≈1 inch) by 11cm (≈4 inches).
- You can use one of the semi circle punches to round off the short sides.
step 2 - Cut out the indents
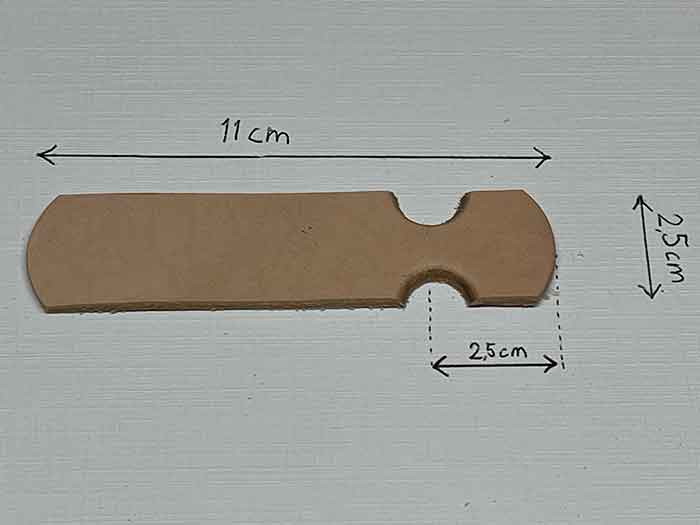
- Use the semi-circle punch to cut out 2 indents from the side of the strip, about 2,5cm (≈ 5 inch) from one end.
- Make sure that the narrowest part is at least 8mm (≈ 0.3 inches) wide.
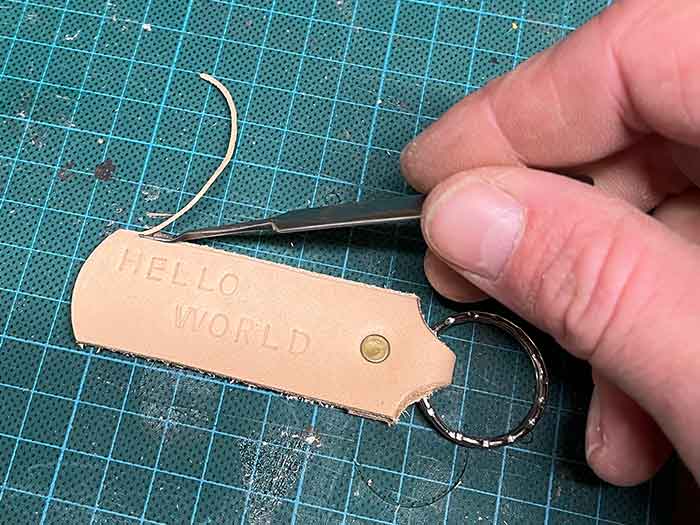
step 3 - Add the text
- Use the letter punches to add your text to the leather.
step 4 - Cut the holes for the rivets
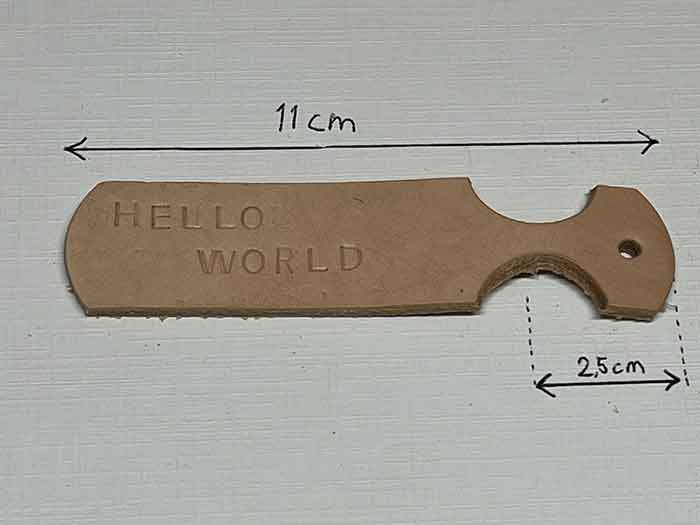
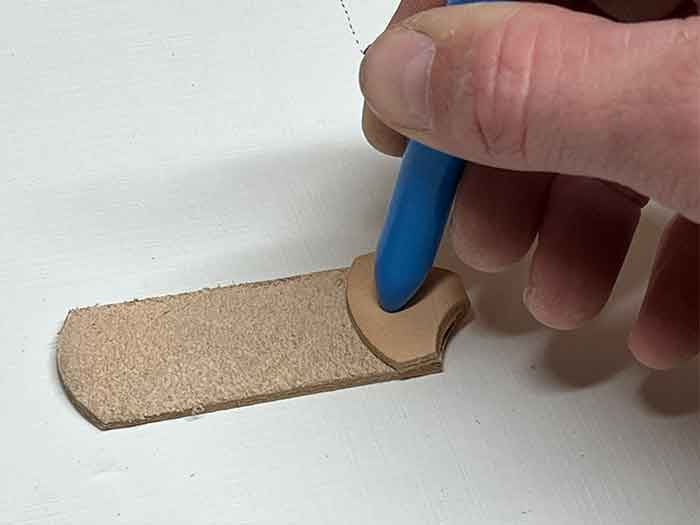
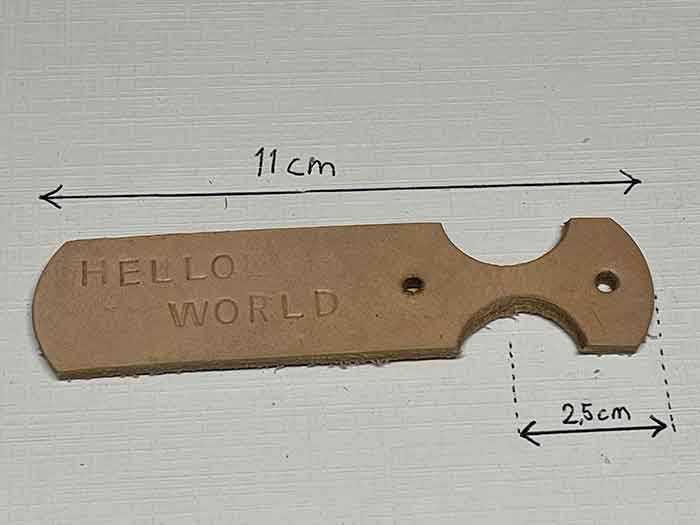
- Use a punch to cut out a hole for the rivet, about 1cm (0.4 inches) from the side of the leather strip.
- Fold the end over and mark the position of the second hole with a marker.
- Punch the second hole.
step 5 - Rivet
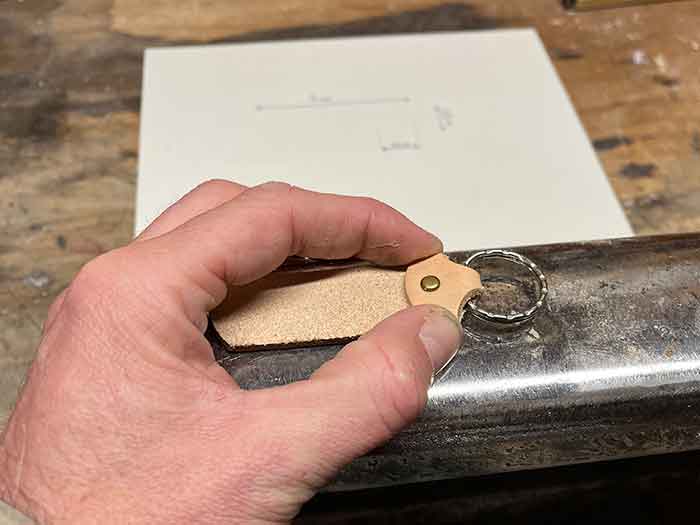
- If you have a hammer with round edges, use this when riveting. Using round edges reduces the chance of leaving marks on the leather.
- Place the key-ring, fold over the leather and use a rivet to fix it in place.
step 6 - Burnishing
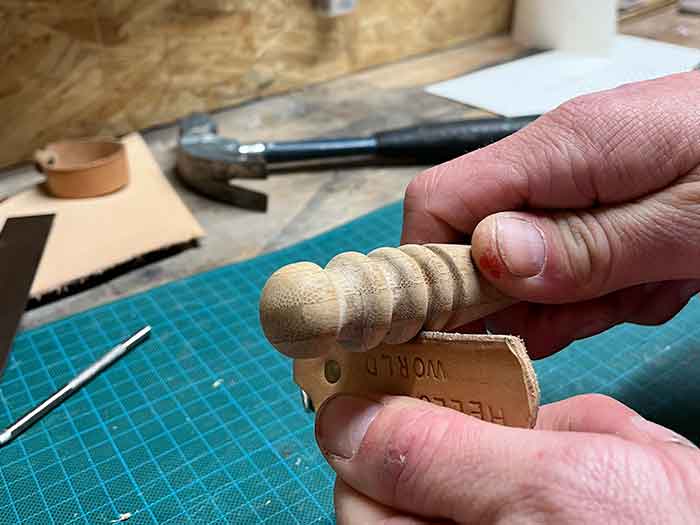
- This step is optional. It will give your leather nice shiny edges.
- Use an edge beveler to create a beveled edge on both sides.
- Wet the edge of the leather with some water.
- Rub the edge with a burnishing tool until a nice shiny rounded edge has formed.