Light up sign
duration: 30 - 60 minutes
age: from 7 years
Make an acrylic sign that lights up.

tools
- Laser cutter
- Soldering iron
- cotton-tips or small paint brush
- Computer with laser cut software installed (Lightburn in my case)
- Hot glue gun
materials
- Wood glue
- Solder
- LED strip
- USB cable
- 3mm plywood
- 5mm acrylic sheet
downloads
step 1 - Prepare the design
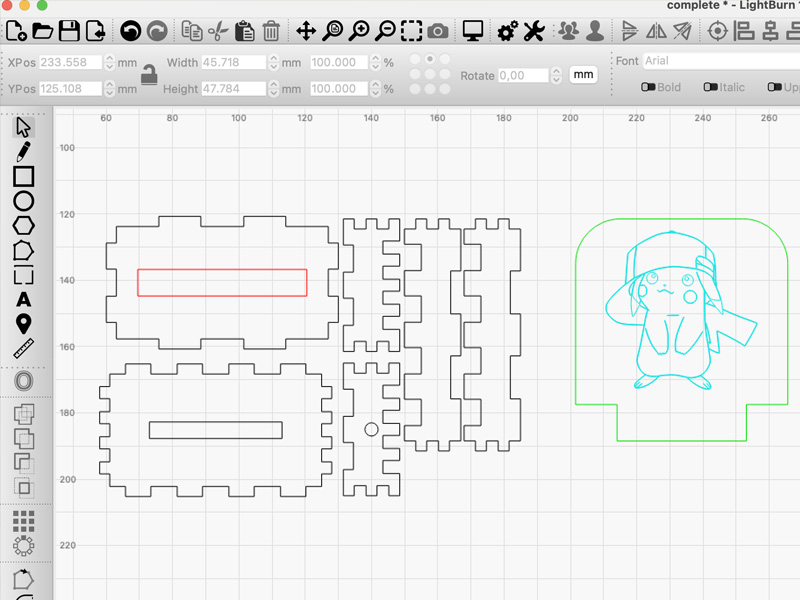
- Find or create a design you like. A high quality black and white image with not too many details works best.
- Open the attached template in Lightburn.
- Drag your own design into the template.
- Trace your design
- Scale and place your design into the template.
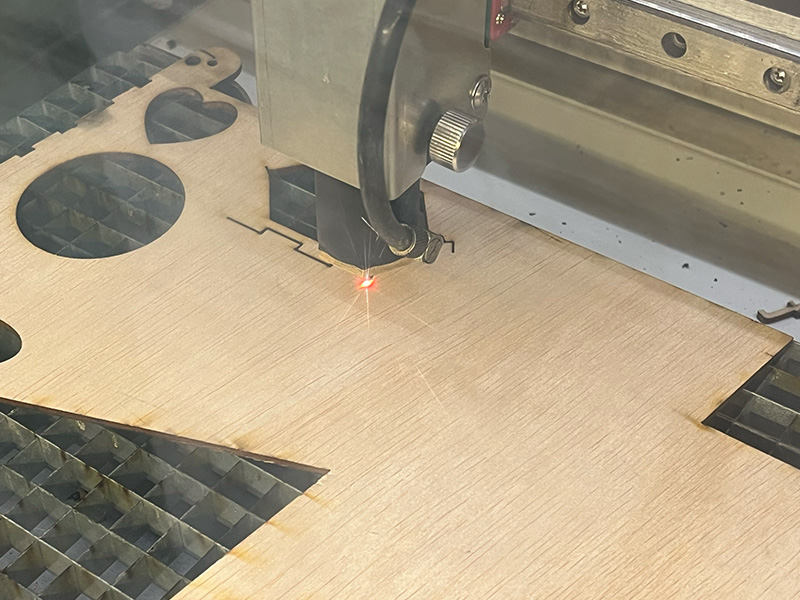
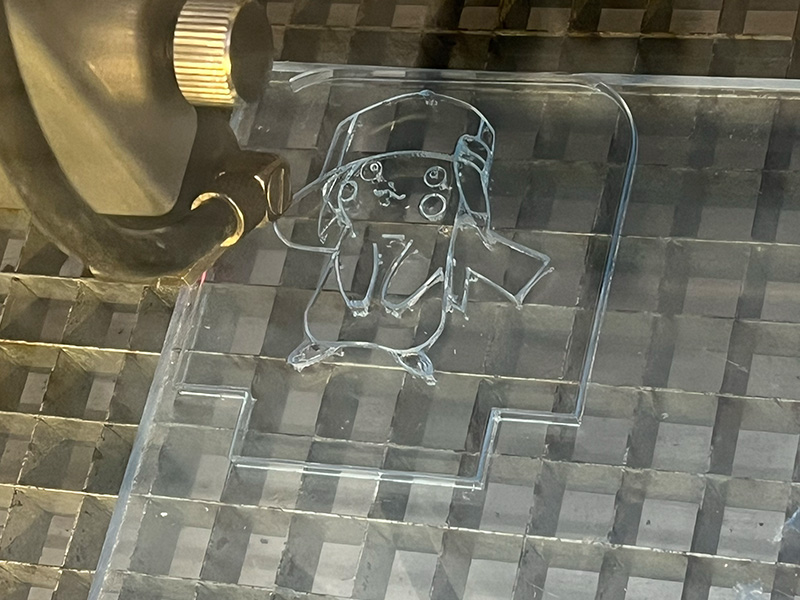
step 2 - Cut out the design
- For the cleanest cut: if your acrylic has a protective film, remove the film after cutting.
- Cut out the wood design using the lasercutter.
- Cut and engrave the acrylic with the design.
step 3 - Assembly
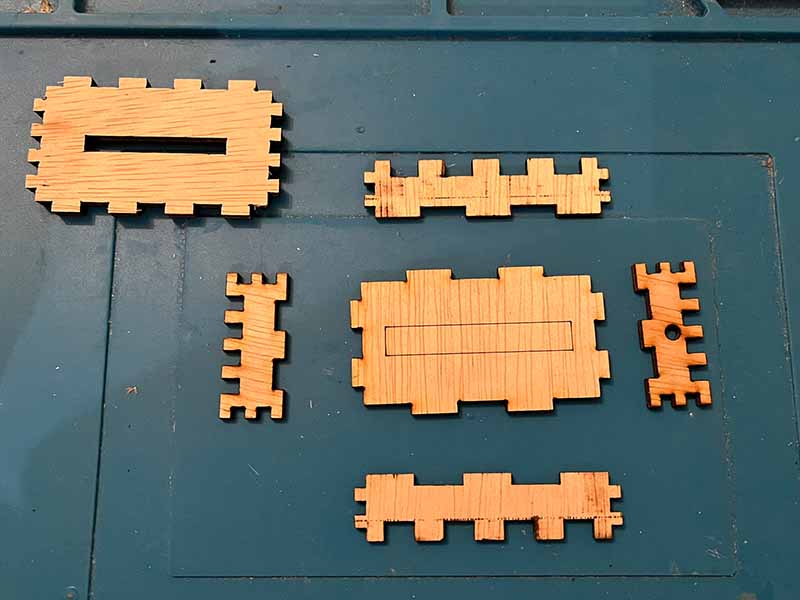
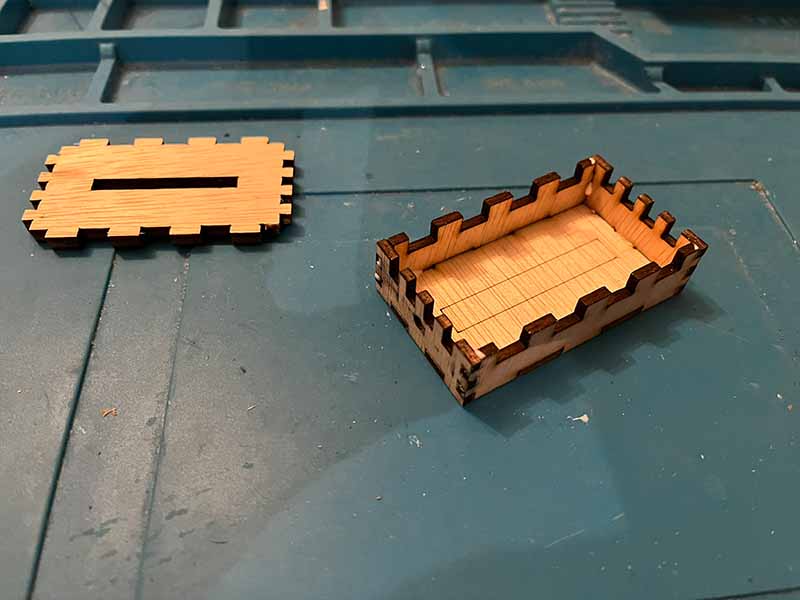
- Use the cotton tip or brush to put some wood glue on the wood.
- Assemble the bottom and the sides of the stand. Make sure that the engraved square is on the inside.
- Do NOT glue the top, we still need to get inside.
step 4 - Solder the led strip
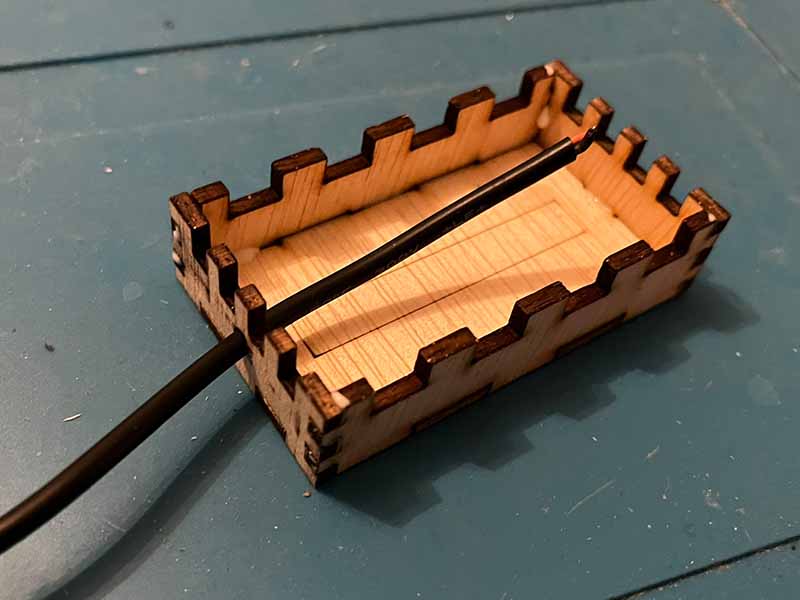
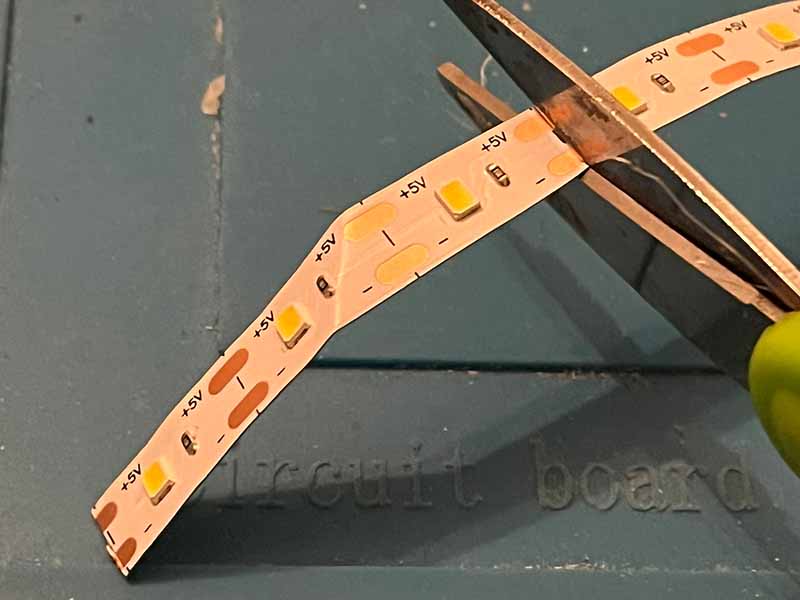
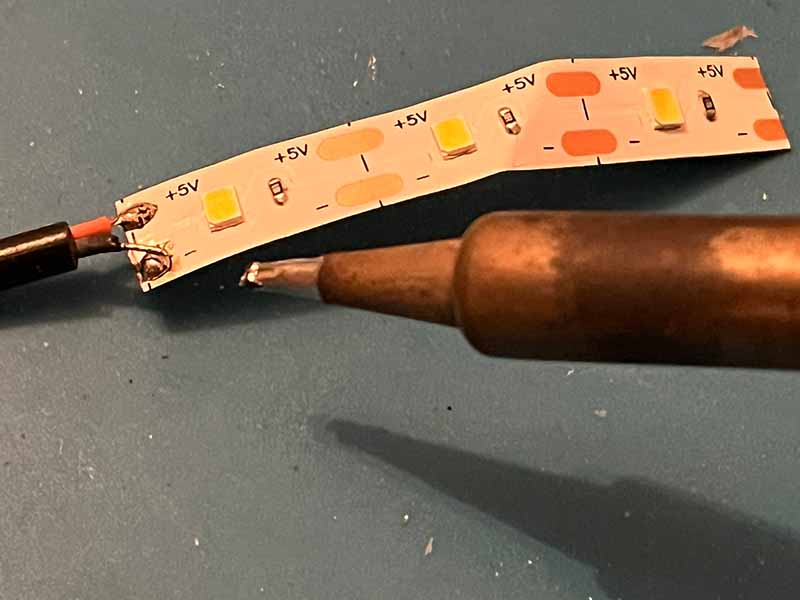
- When cutting LED strips, make sure to only cut at the marked spots.
- Cut a piece of the ledstrip. You will need 3 LED's.
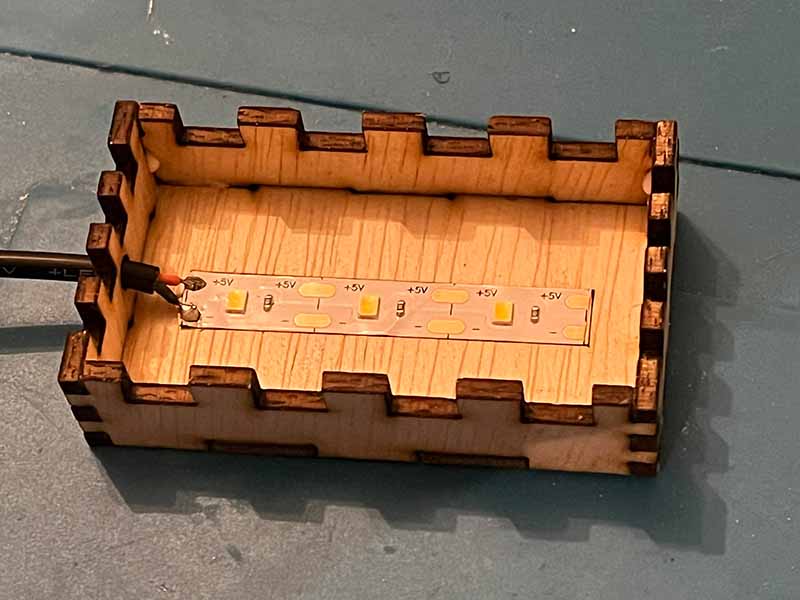
- Feed the cable trough the hole in the side of the box.
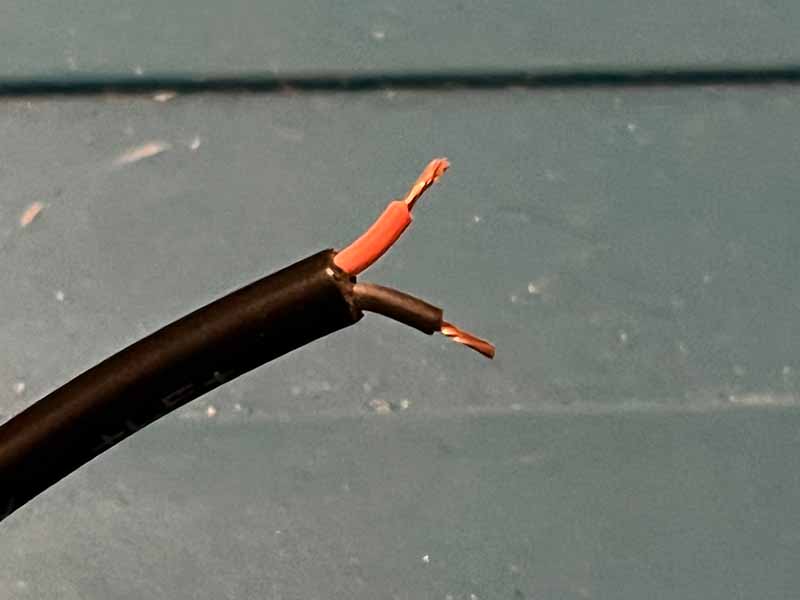
- Cut and strip the USB cable. You will need the red and black wire.
- Solder the red wire to the + , and the black to the - of the LED strip.
- Solder the red wire to the + , and the black to the - of the LED strip., and stick the strip to the marked spot inside the box
- Test the lights.
step 5 - Place the LED strip
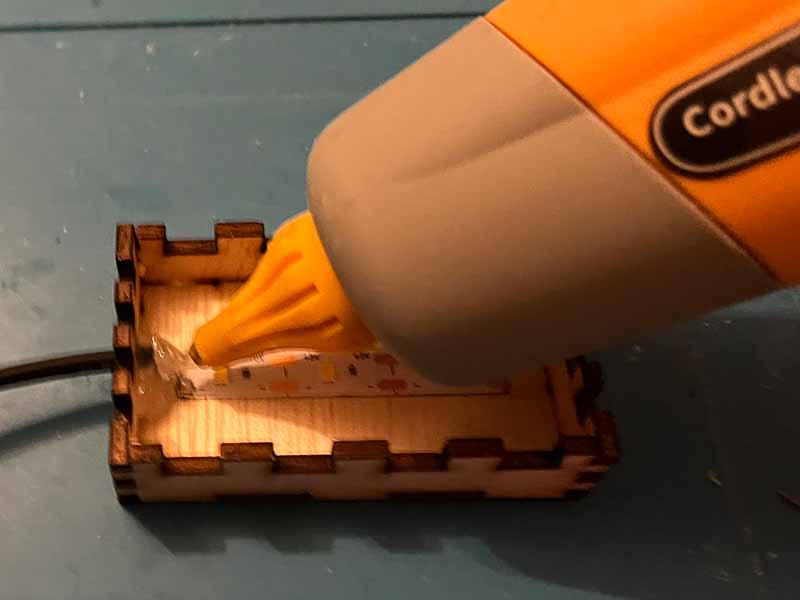
- Your LED strip might have adhesive on the back. Use this, or some hot glue, to attach your LED strip inside the engraved rectangle.
- Use the hot glue gun to attach the cable to the box.
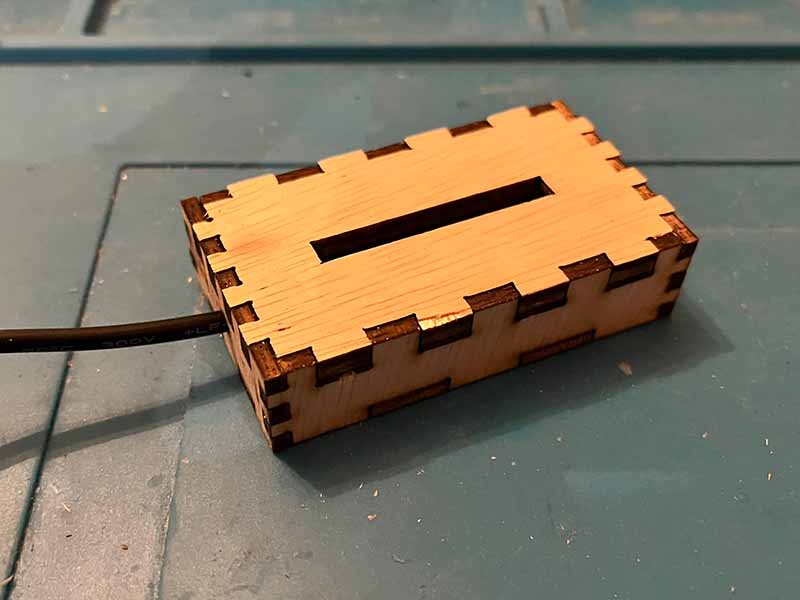
- Glue the top of the stand on.
step 6 - Finish it up
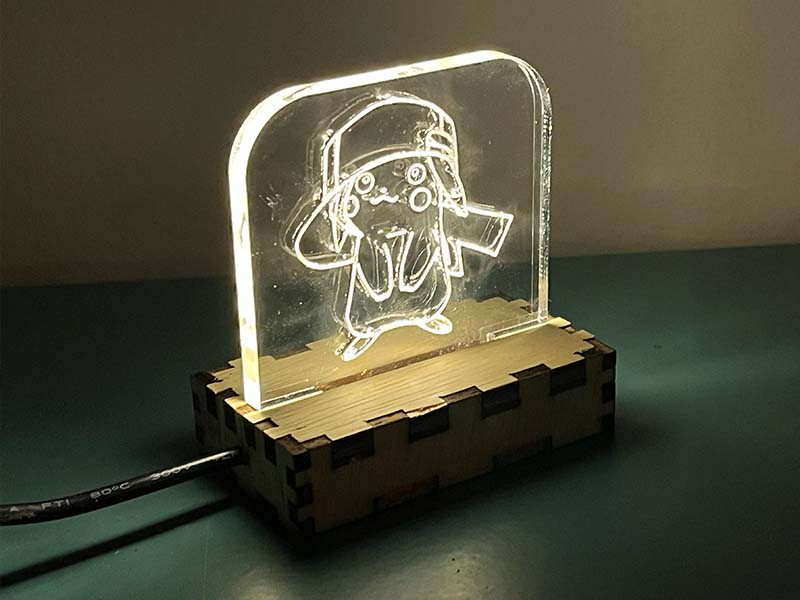
- Place the acrylic piece into the box and admire your work!