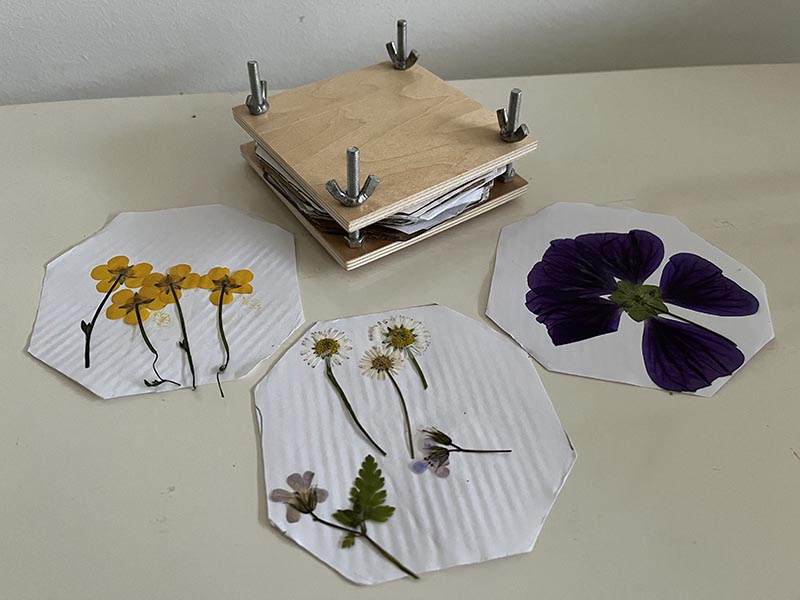
Flower press
duration: 20 - 45 minutes
age: from 7 years
Make a flower press to create flower art with real flowers.
tools
- regular or scrollsaw
- drill
- 8mm drill bit
- ruler
- pencil
- knife or scissors
materials
- Wood (5mm thick)
- M6x40mm bolts (4x)
- M6 nuts (4x)
- M6 wingnuts(4x)
- cardboard
- paper
- flowers
- painters tape
downloads
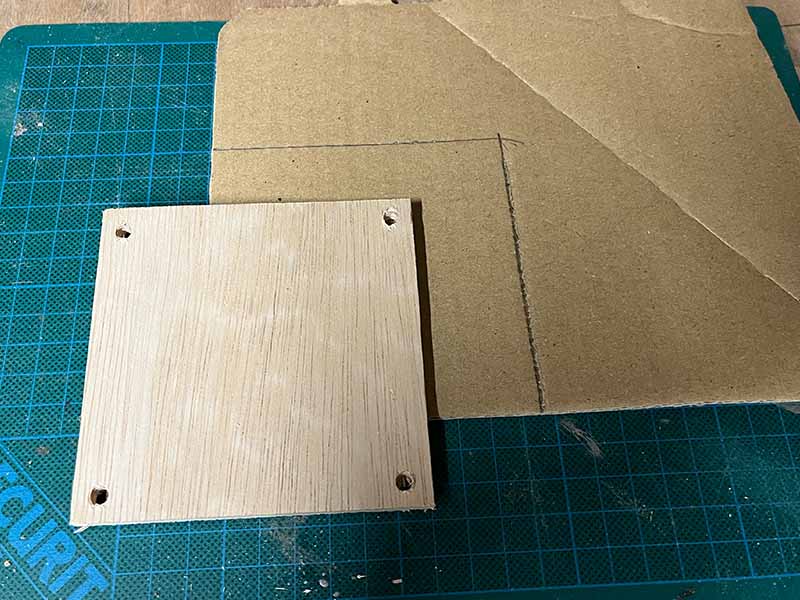
step 1 - Cut the wood
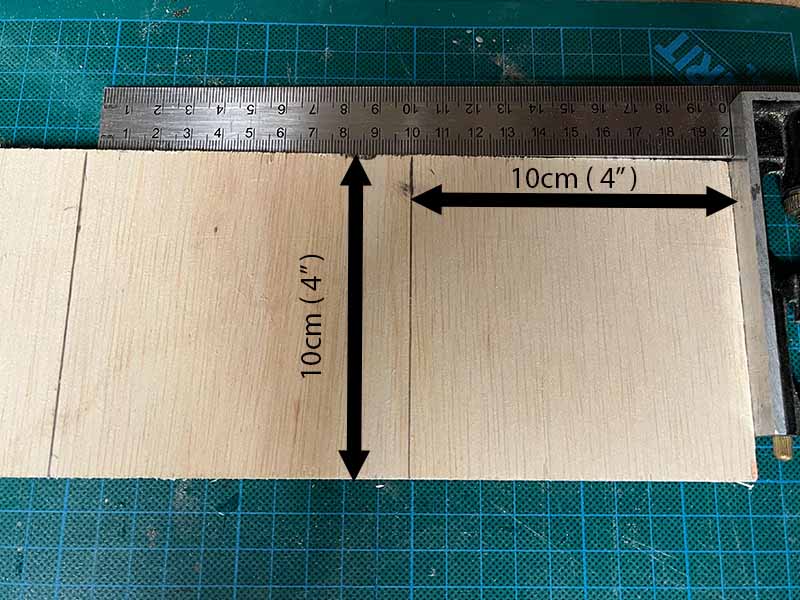
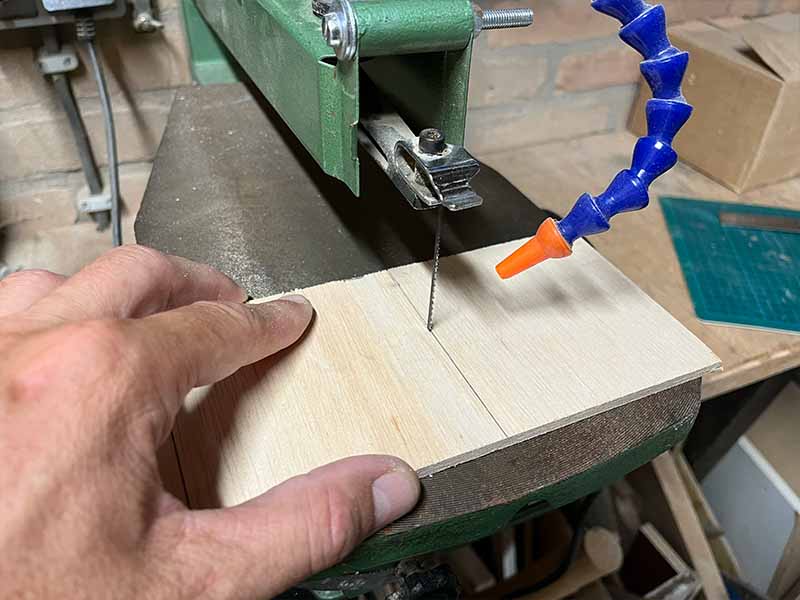
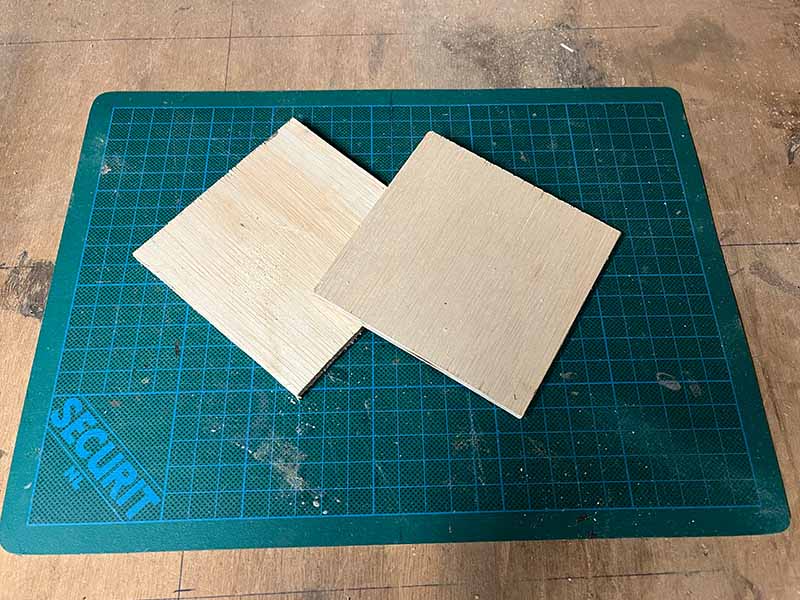
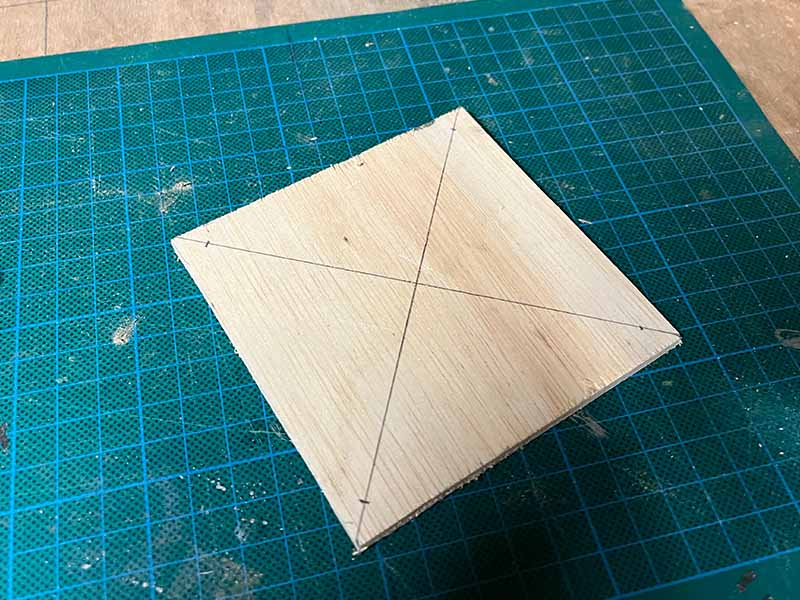
- Using the ruler draw 2 squares of 10 by 10 cm. (4 by 4 inches)
- Cut out the 2 squares using the saw.
step 2 - Drill the holes
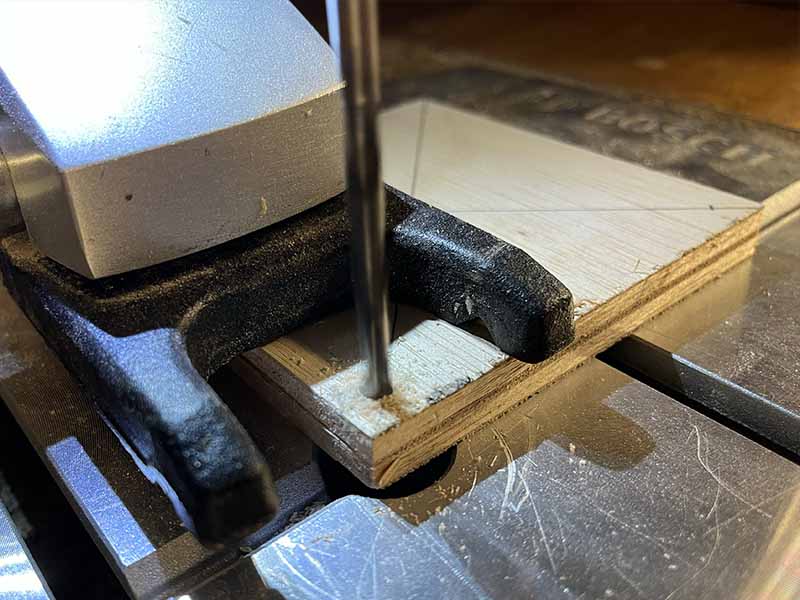
- When drilling, always make sure your hair or clothing (hoody strings) can not reach the drill bit.
- On one of the wooden squares, mark 4 points approximately 1 cm (1/2 inch) from the corners
- Place the marked wooden square on top of the other one, and tape em together using the painters tape. This will make sure the squares will not move while drilling.
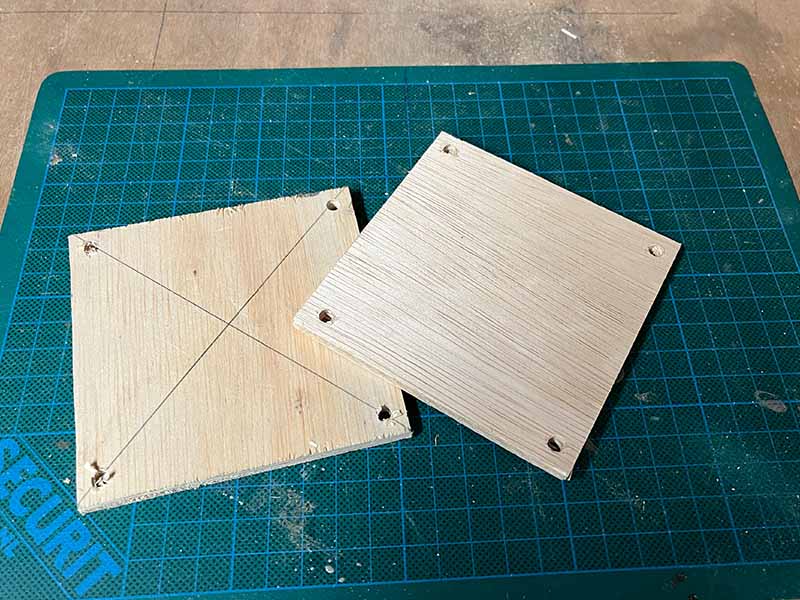
- Drill holes trough both planks on the spots you marked.
step 3 - Attach the bolts
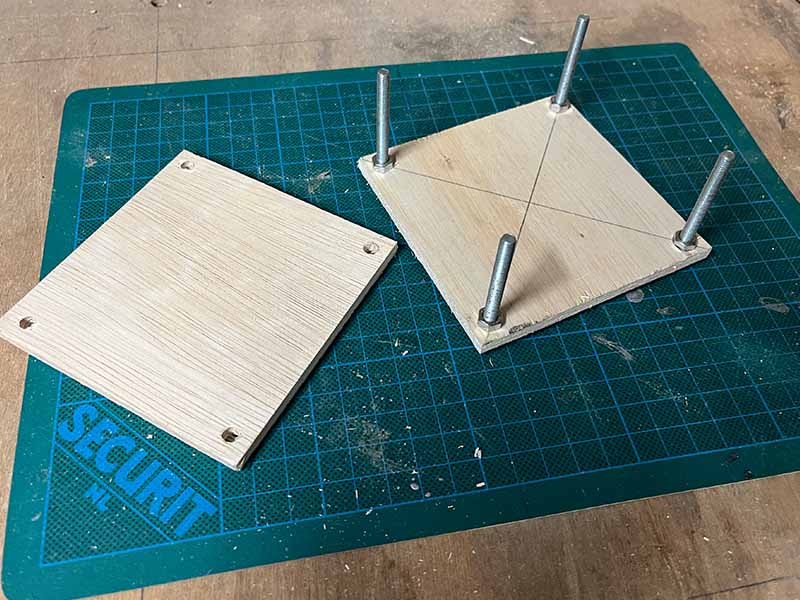
- Place 4 bolts trough the holes and fasten them using the nuts
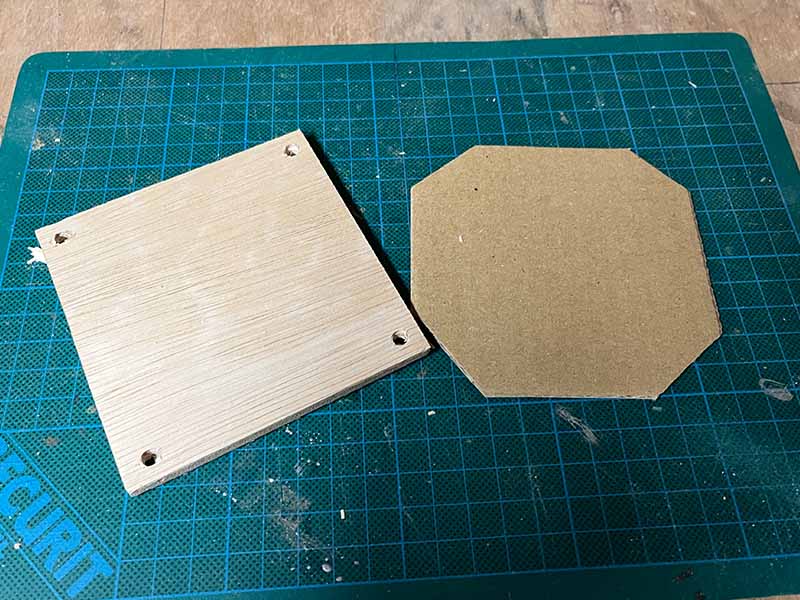
step 4 - Cutting the cardboard
- When using a knife, multiple light passes will have a better result than one deep pass.
- Using the planks as template, mark out 5 or more squares on your cardboard.
- Cut out the squares using the knife or scissors.
- Cut off the corners to make room for the bolts.
step 5 - Cutting the paper
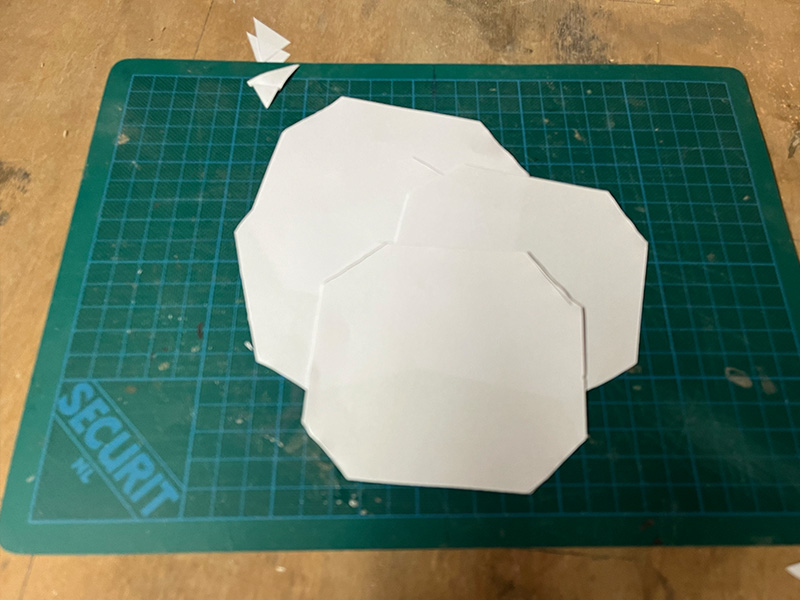
- Cut out the same shape as the cardboard.
- If you have 5 cardboard pieces, you will need 6 pieces of paper.
step 6 - Place your flowers
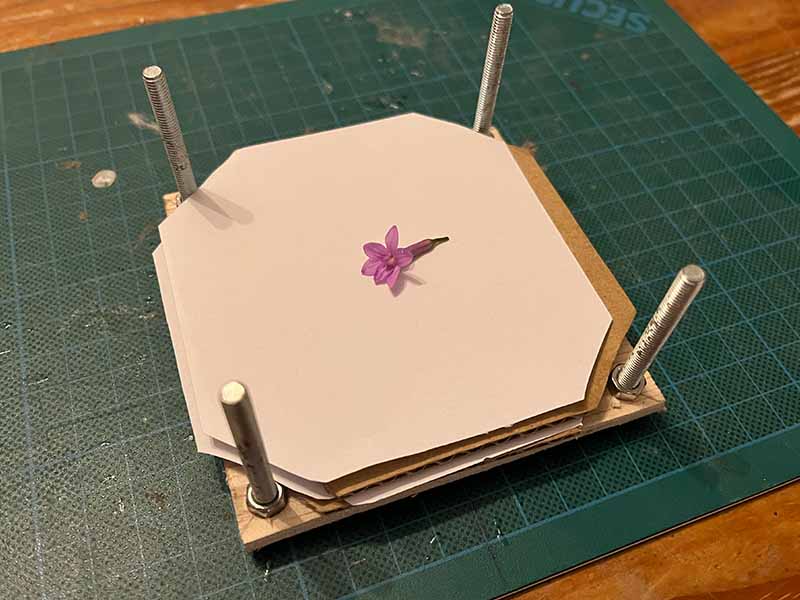
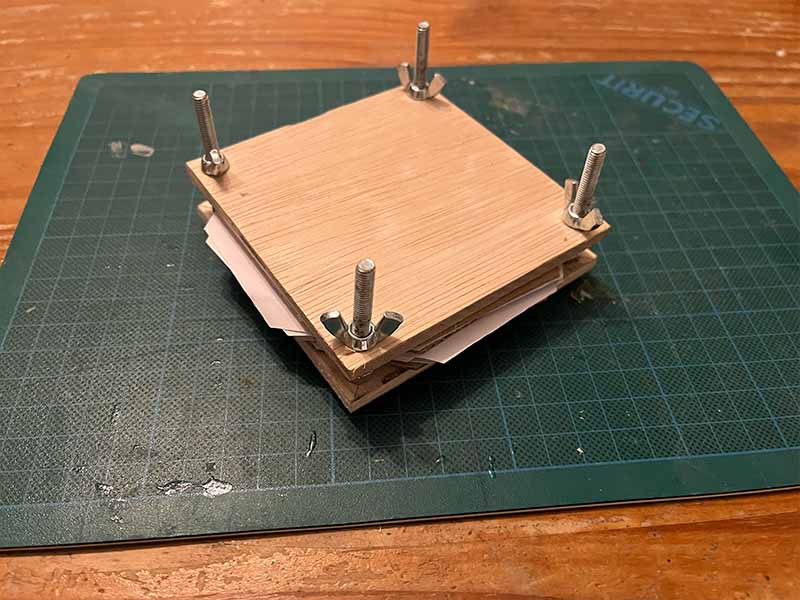
- Now stack everything in your flower press: cardboard, paper, flower, paper. Repeat this until all the cardboard pieces are used.
- Place the second wooden square on top and tighten everything well with the wingnuts.
step 7 - Waiting.... and done!

- After about a week, you can remove the flowers. Thicker flowers may need a bit more time.