Christmas decoration with music
duration: 30 - 60 minutes
age: from 7 years
A Christmas ornament that can play Christmas tunes.

tools
- soldering iron
- cutting pliers
- glue gun
- laser cutter
materials
- PX088 melody chip
- battery holder (3v)
- small speaker
- 100nf capacitor
- S8050/2N2222 transistor
- wood
downloads
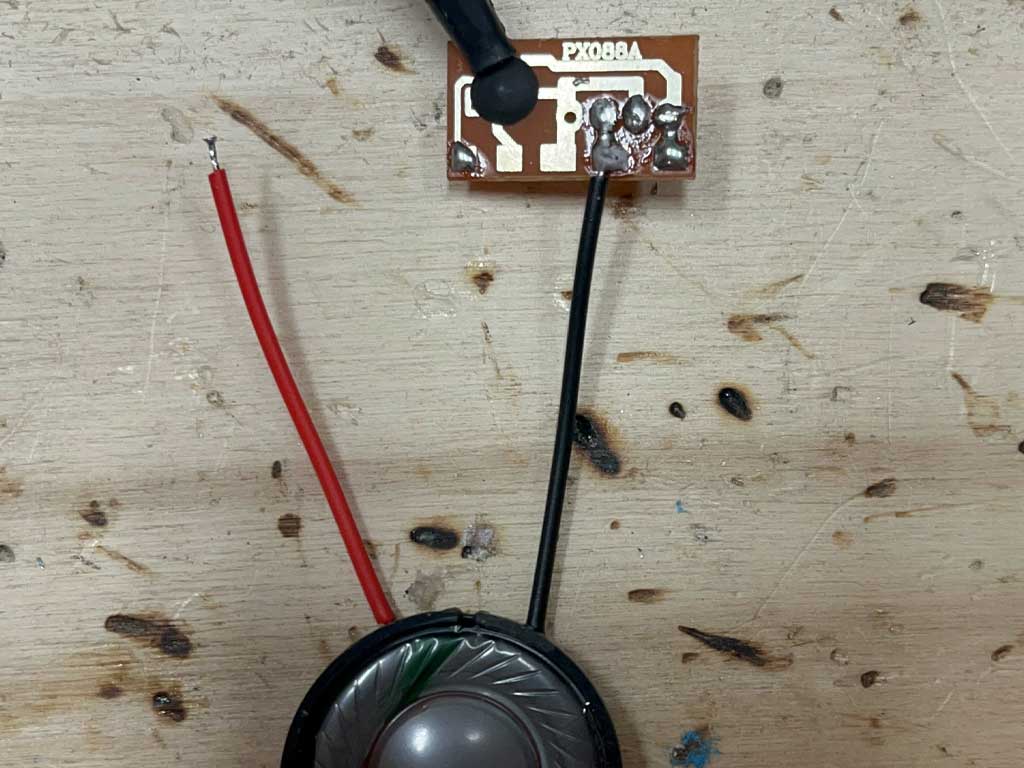
step 1 - Solder wires to your speaker
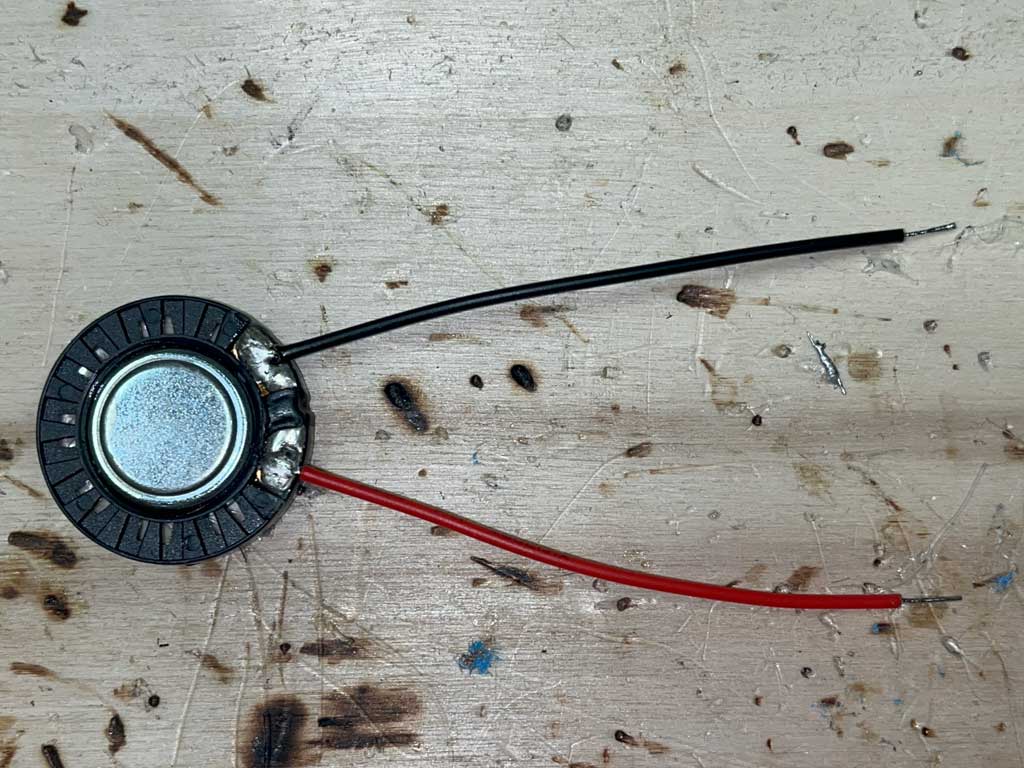
- Cut about 4 cm from the wires of the battery holder.
- Solder the cut-offs to your speaker.
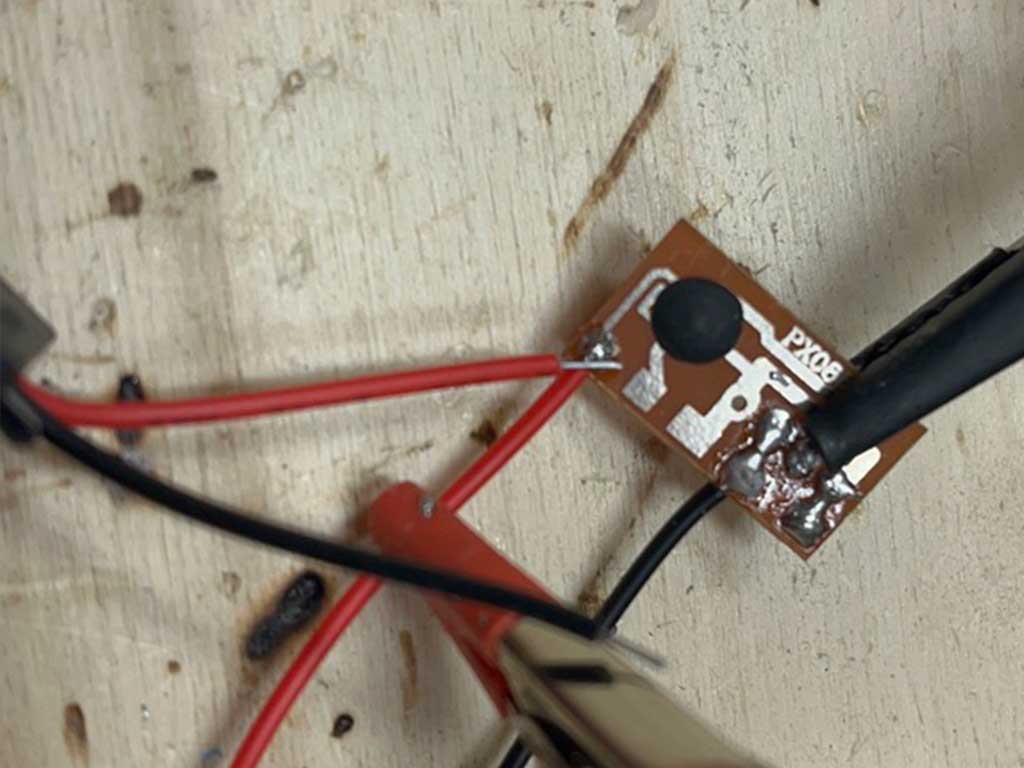
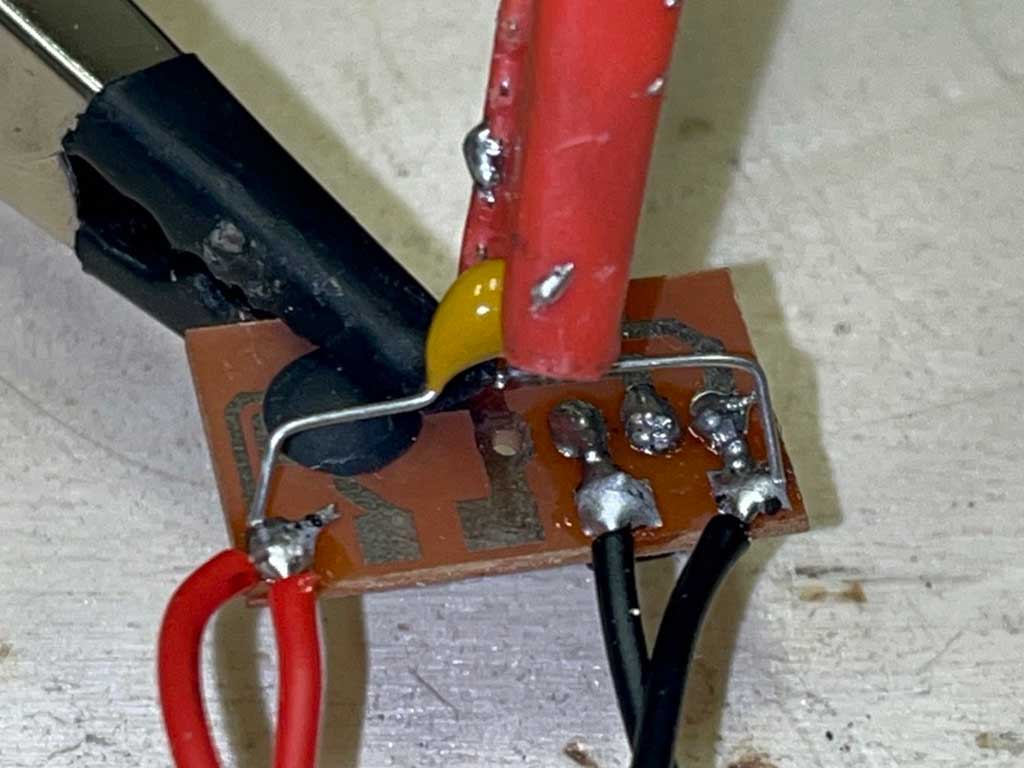
step 2 - Solder the transistor
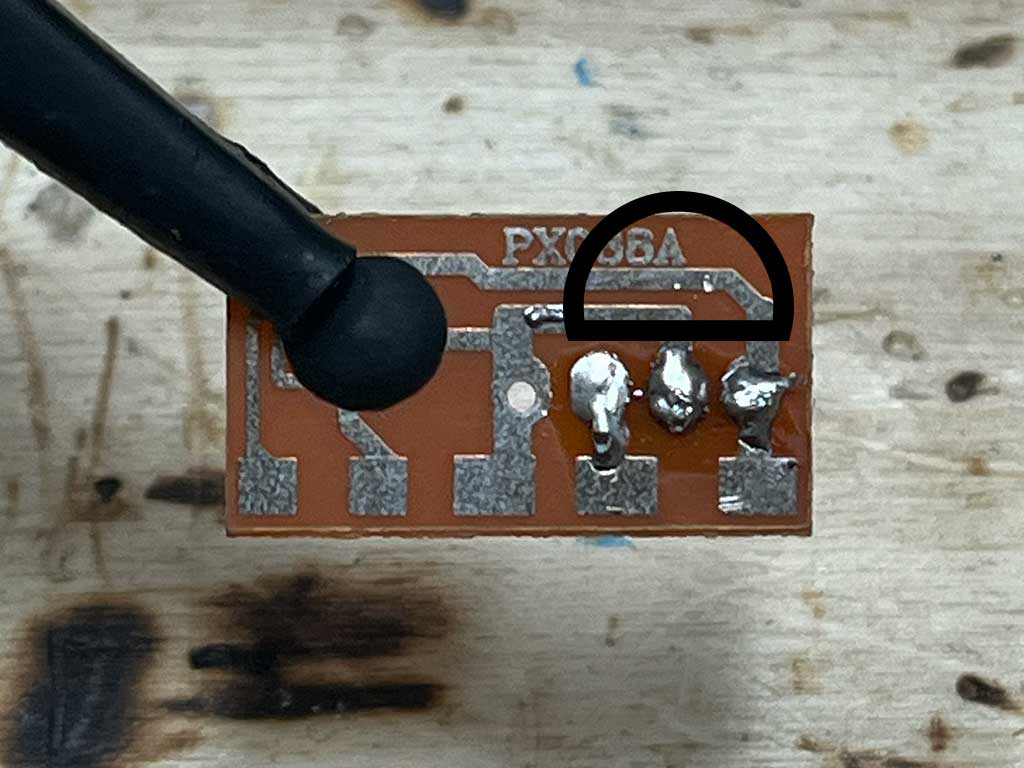
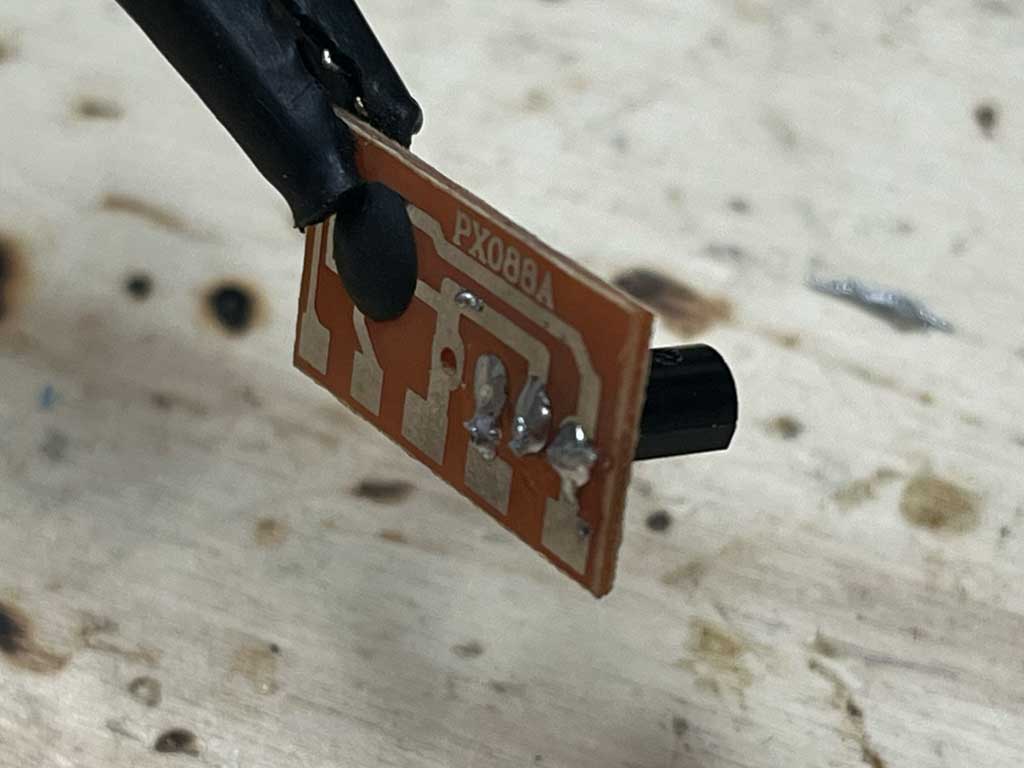
- Place the transistor on the back of the circuit board. The legs need to be slightly bent open.
- Solder the transistor as shown in the photos. Pay close attention to where the flat side is.
step 3 - Tin the pads
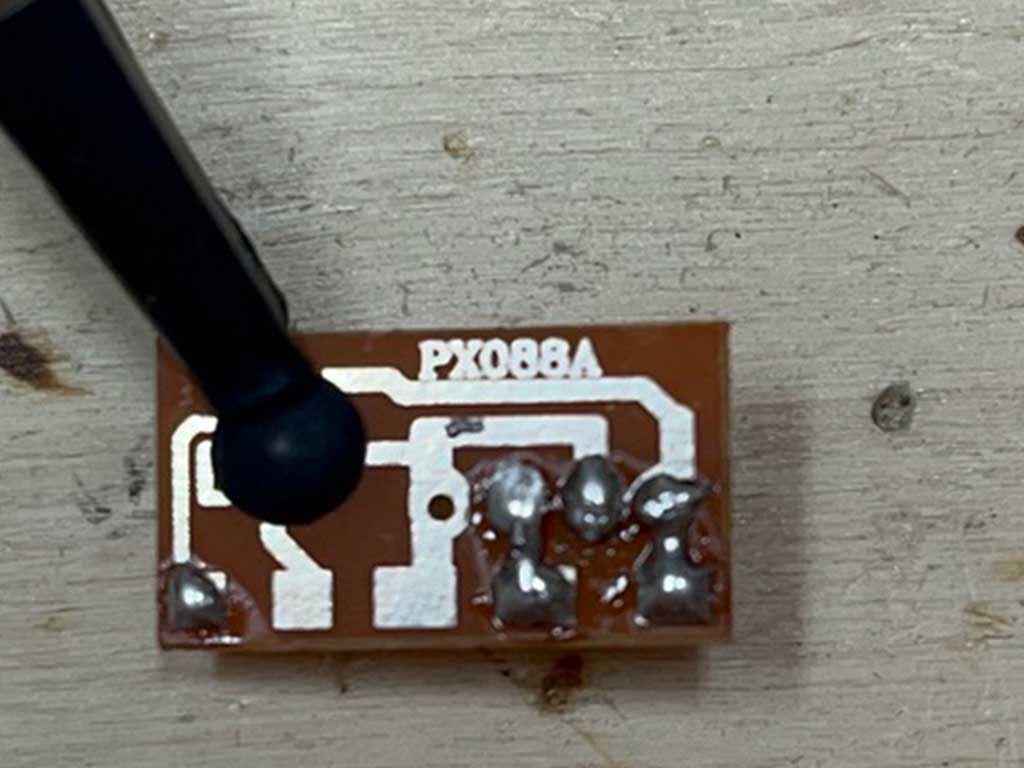
- Apply some tin to the 1st, 4th, and 5th pad from the left.
step 4 - Solder the speaker, transistor, and battery holder
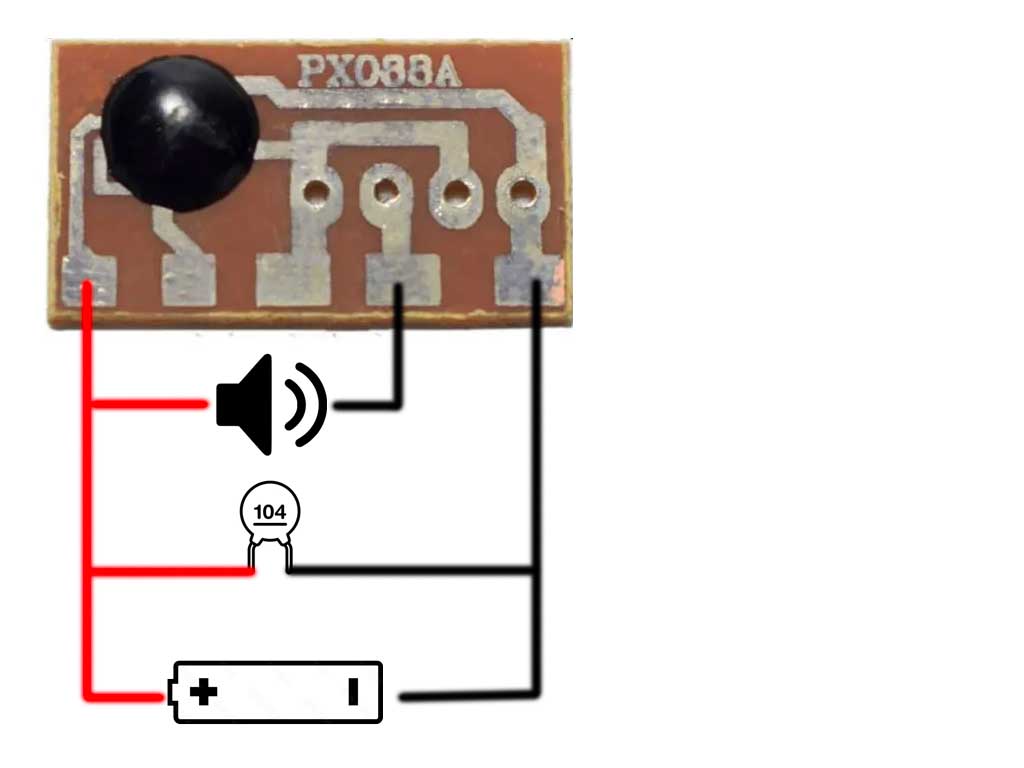
- Soldering multiple wires/legs to one pad can be tricky. A 'third hand' or other way to hold your work can be handy here.
- Tin the ends of all the wires.
- Solder the wires according to the diagram.
- Insert a battery and test it.
step 5 - Design the Christmas ornament
- Open Light Burn.
- Copy a Christmas ornament silhouette from the internet and paste it into Light Burn.
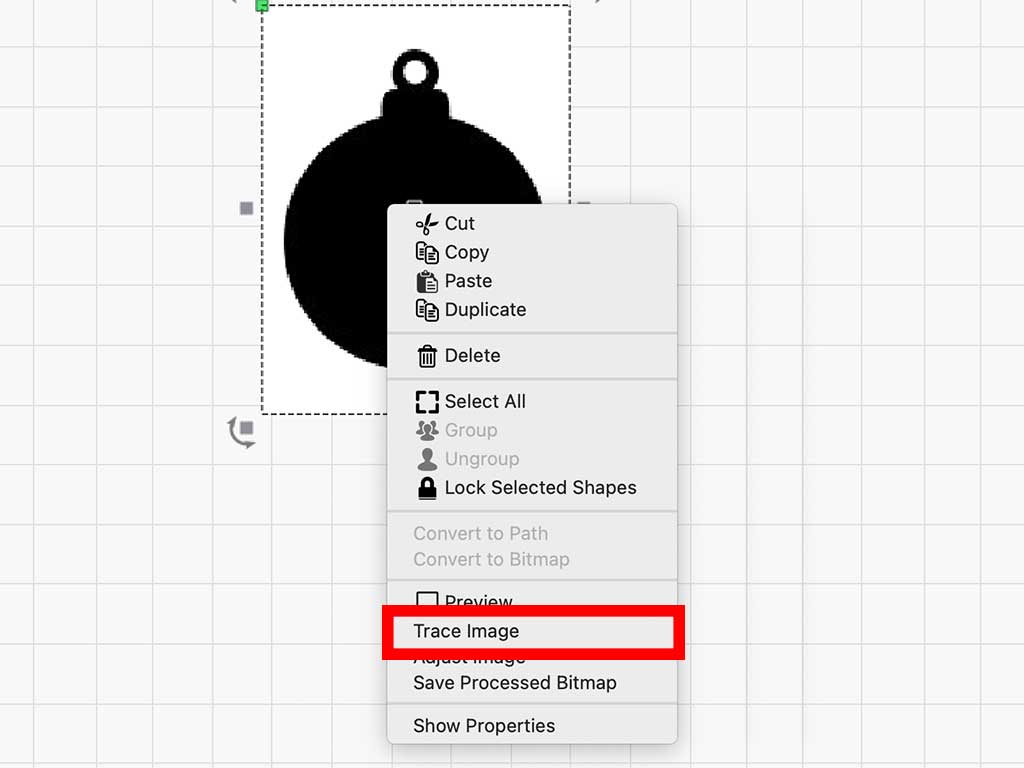
- Right-click on the image and select 'trace'. After tracing, you will have a line drawing.
- Delete the original image.
step 6 - Design the Christmas ornament decoration
- Create a line drawing of a background as in the previous step.
- Duplicate the ornament and place it over your background.
- Adjust the background so it fits nicely over the ornament.
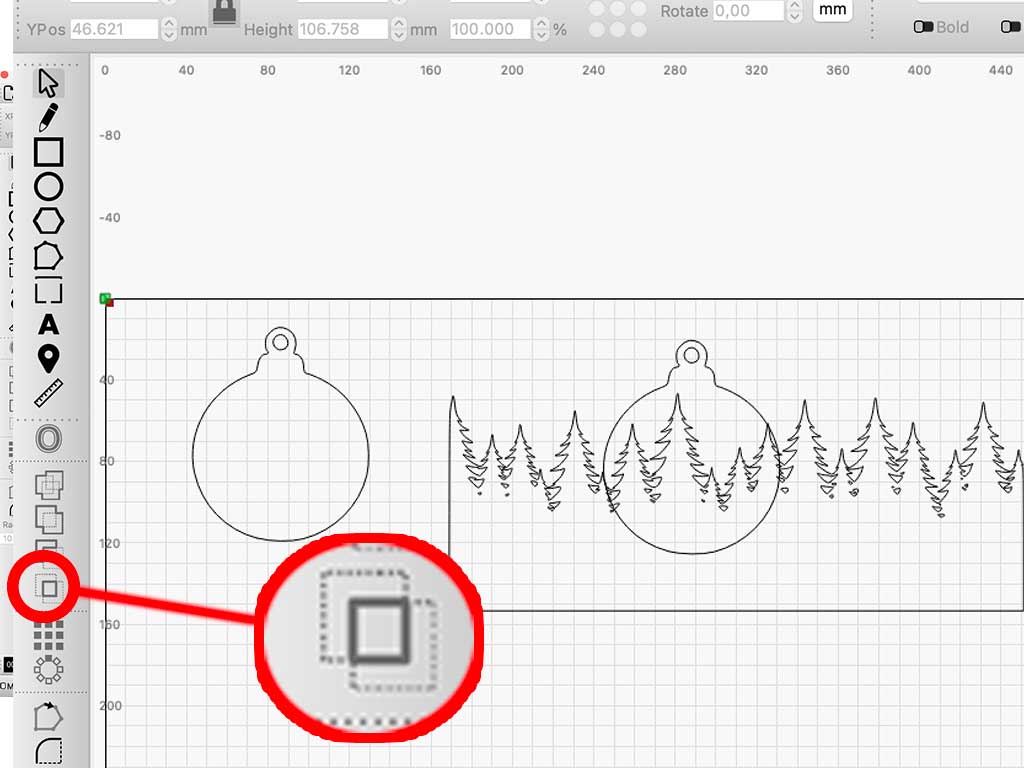
- Select the ornament and the background and click the 'boolean intersection' button.
- You now have a background that fits perfectly into the ornament.
- Create as many layers as you want in this way.
- Cut the layers with a laser cutter.
step 7 - Gluing


- Glue the layers of wood together.
- Glue the speaker, chip, and battery on the back.
- Done! Hang your ornament somewhere or give it to someone.