Traffic light
duration: 15 - 30 minutes
age: from 7 years
Make a working mini traffic light
tools
- Laser cutter
- hobby knife
- drill / drill bit (3mm)
- screwdriver
- pencil
- ruler
- lighter
materials
- thin plywood
- Thick (18,mm) plywood
- 5mm LEDs (red, orange, green)
- narrow copper tape
- CR2032 Battery holder
- CR2032 Battery
- M5 ring
- short screws
- heatshrink tube
downloads
step 1 - Cut the thin wood
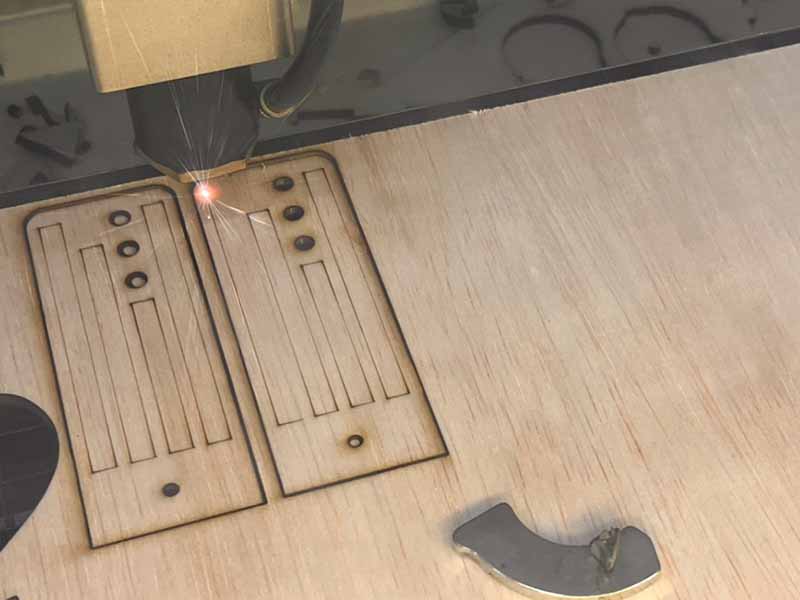
- Use the lasercutter to cut out the template.
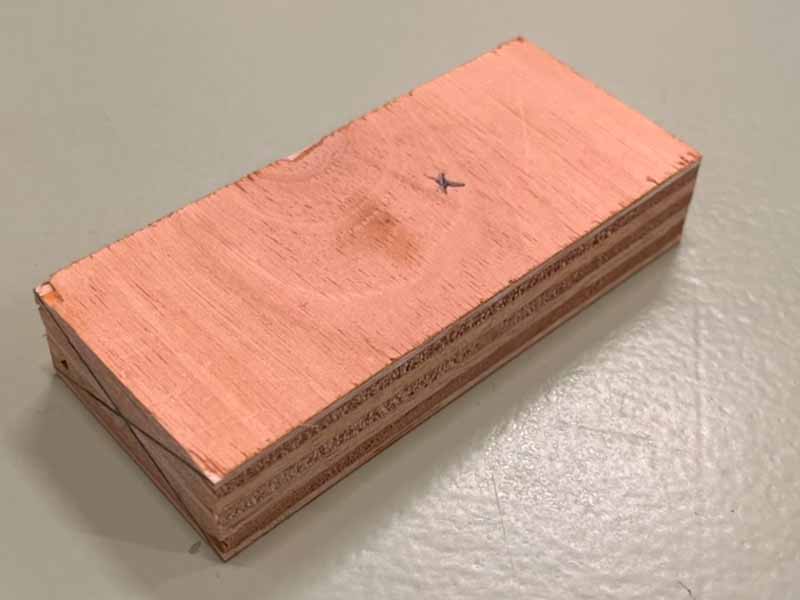
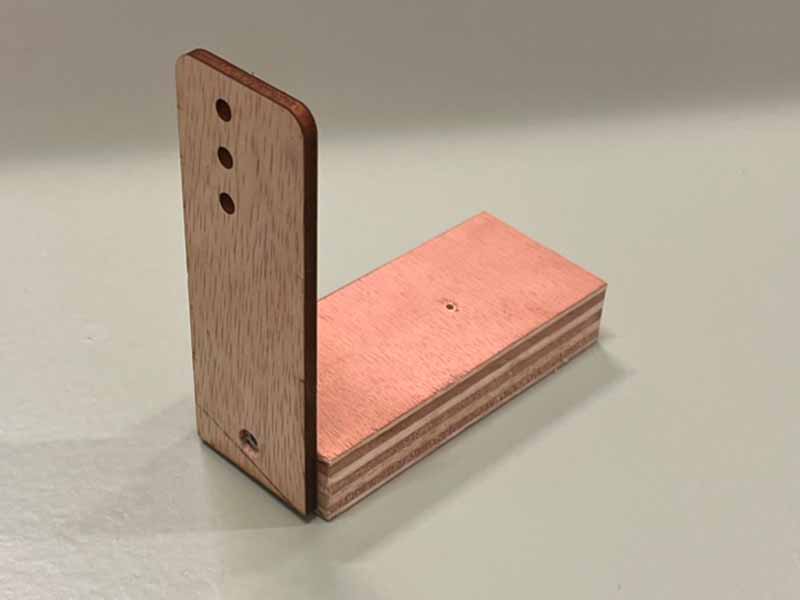
step 2 - Mark the hole locations
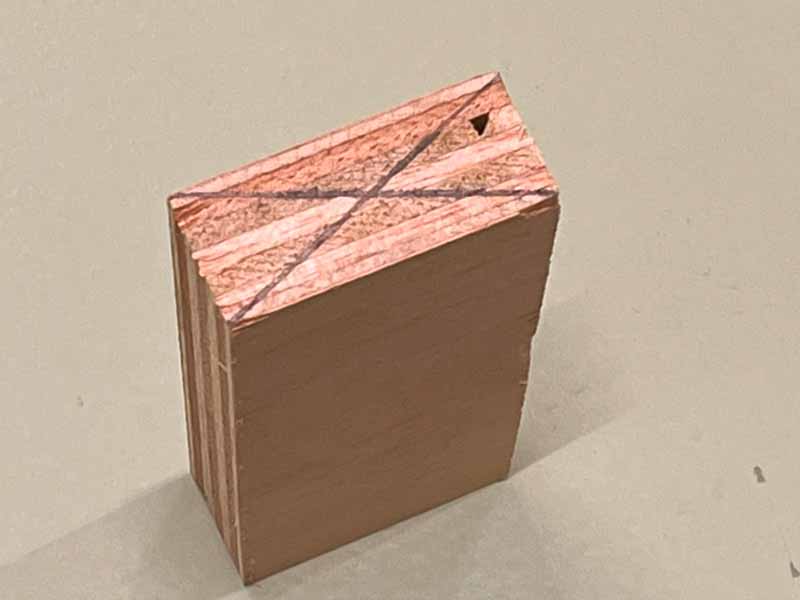
- Use the ruler to draw a cross from corner to corner on the small side of the base.
- Draw another cross in the center of the block, FILL IN SIZE cm from the back.
step 3 - Cut holes
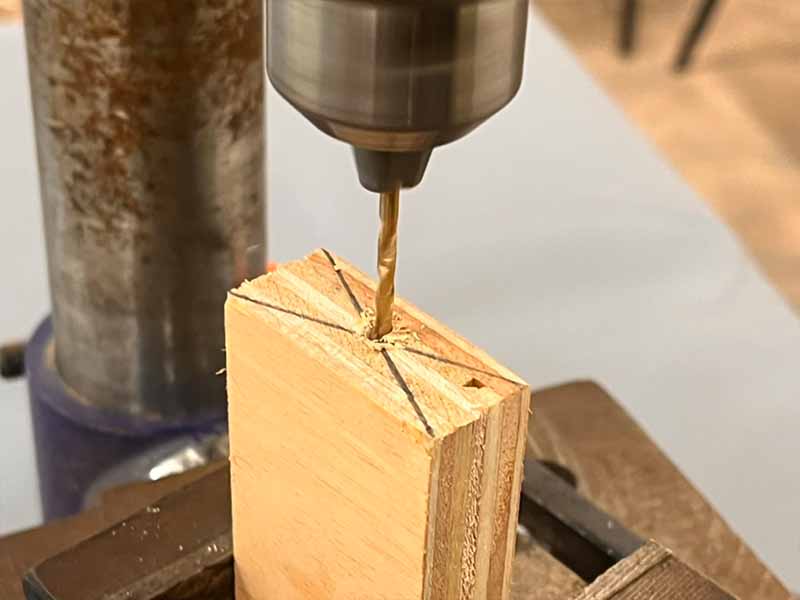
- When using the drill, always make sure strings from your hoody are tucked away, and long hair is put in a pony tail.
- Drill a hole on the 2 locations you marked earlier.
- Use a screw to attach the laser cut piece to the base. Make sure the engraved side is pointing to the back.
step 4 - Tape
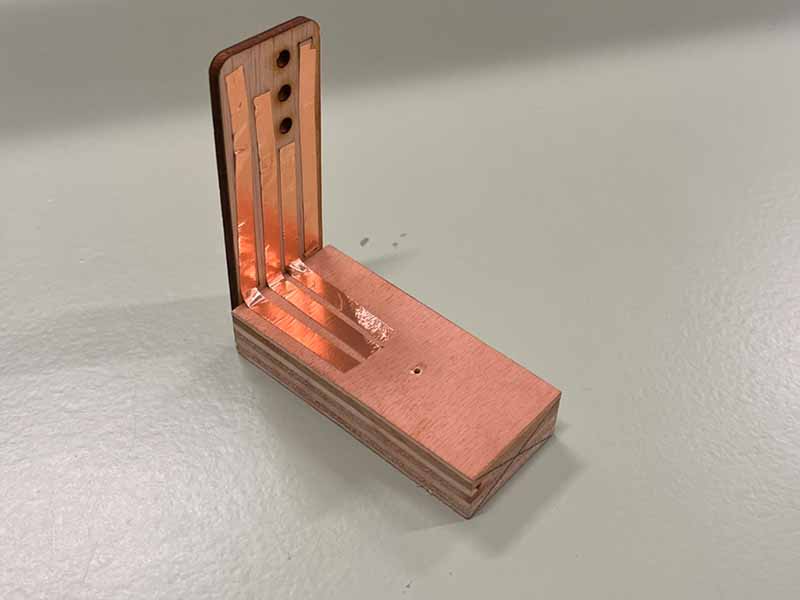
- Cut 4 pieces of copper tape, about 4 inched long.
- Stick the tape as shown in the photo.
- Once all the pieces of tape are on the wood, use a hobby knife to cut the excess tape off.
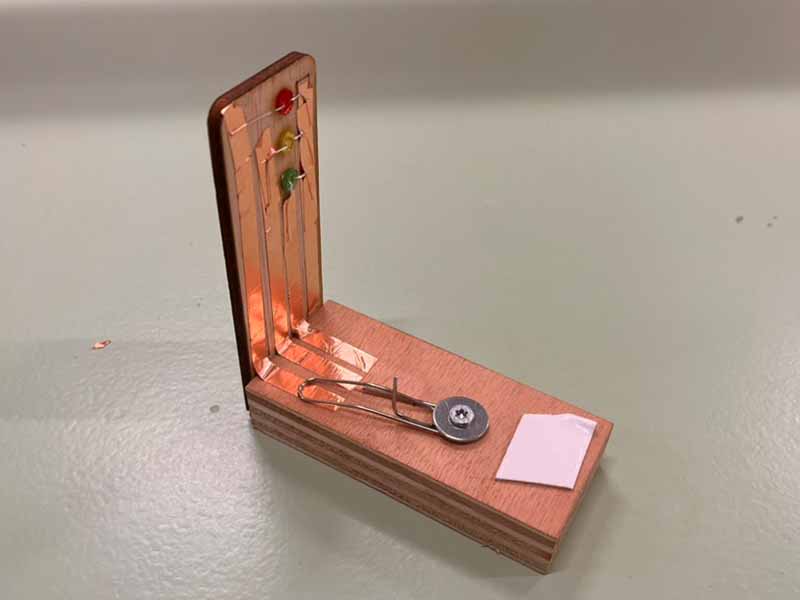
step 5 - Paperclip
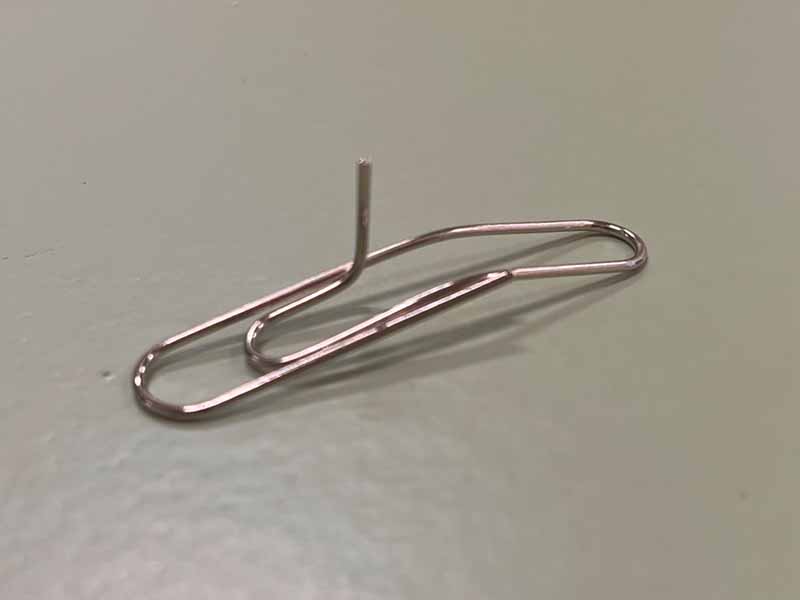
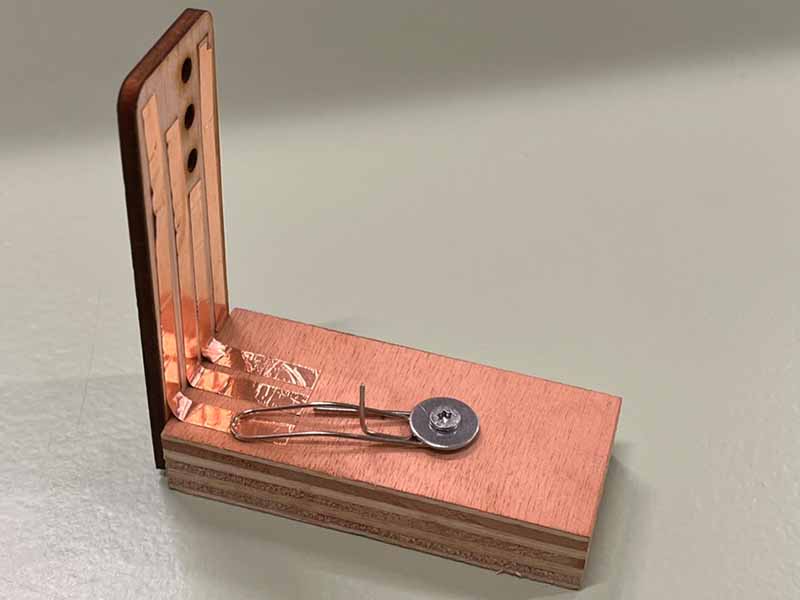
- Bend the paperclip as shown in the picture
- Use a screw and a ring to screw the paperclip onto the wood. It should still be able to move from side to side and touch the tapes.
step 6 - LED's
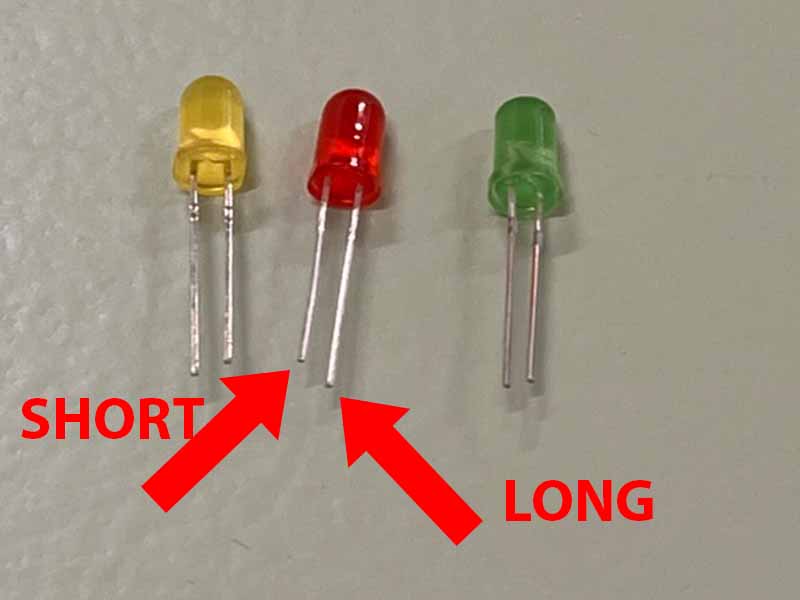
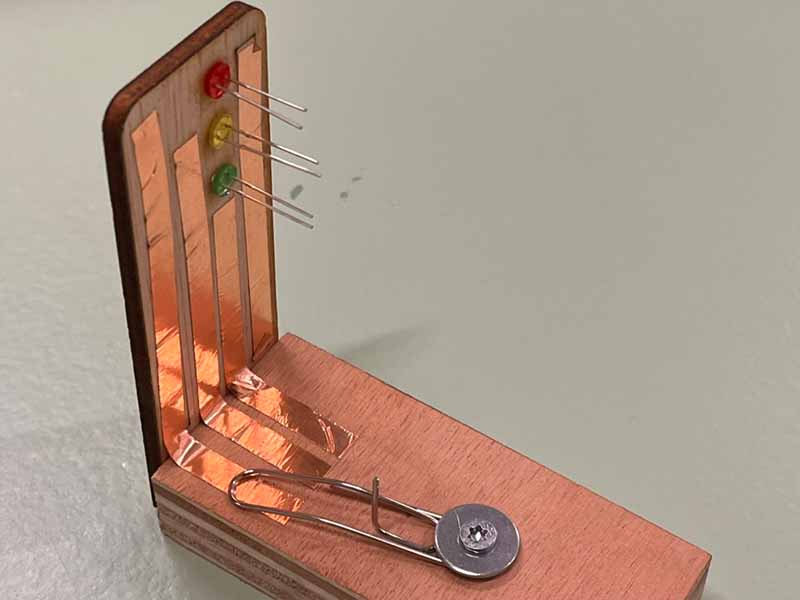
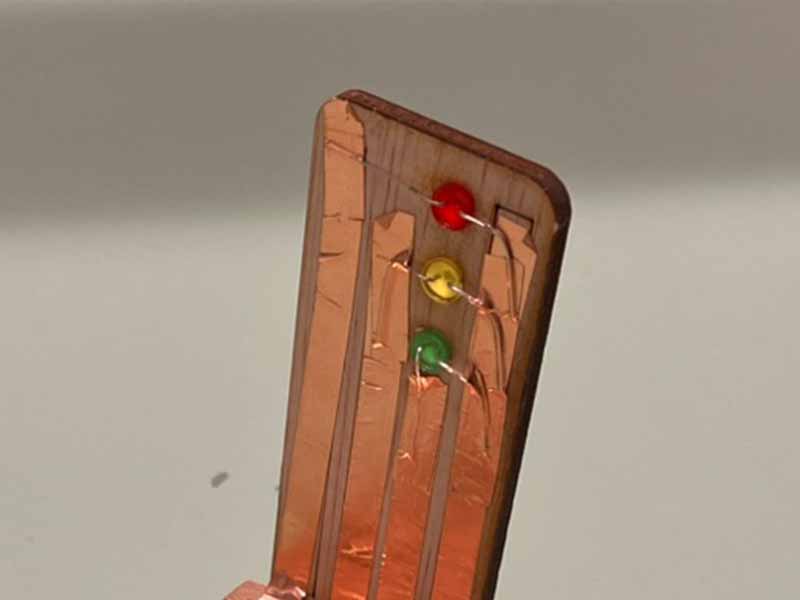
- Each LED has a long and a short leg. Place the LED's in the holes with the long leg to the left.
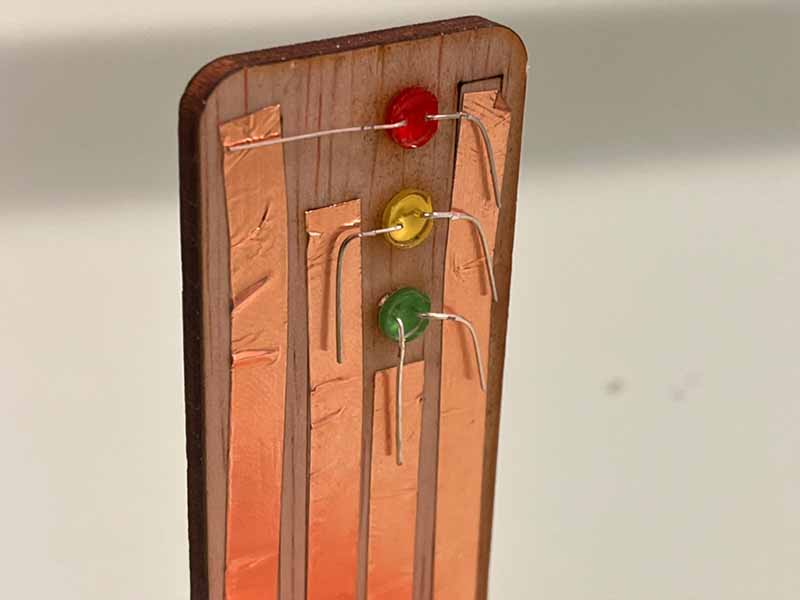
- Bend the legs so that we can tape them down on top of the copper tape.
- Fix the legs in place with some more tape.
step 7 - Battery
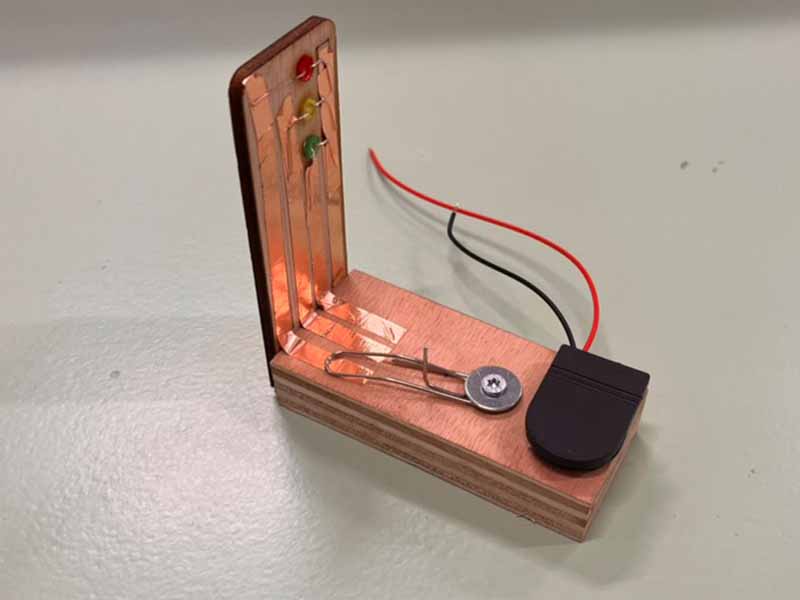
- Attach the battery holder to the base using a bit of double sided tape.
step 8 - Battery
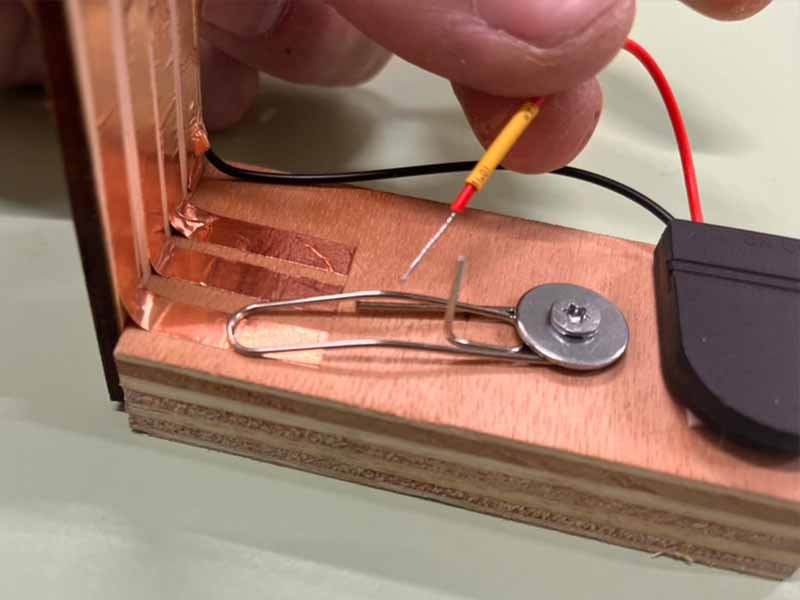
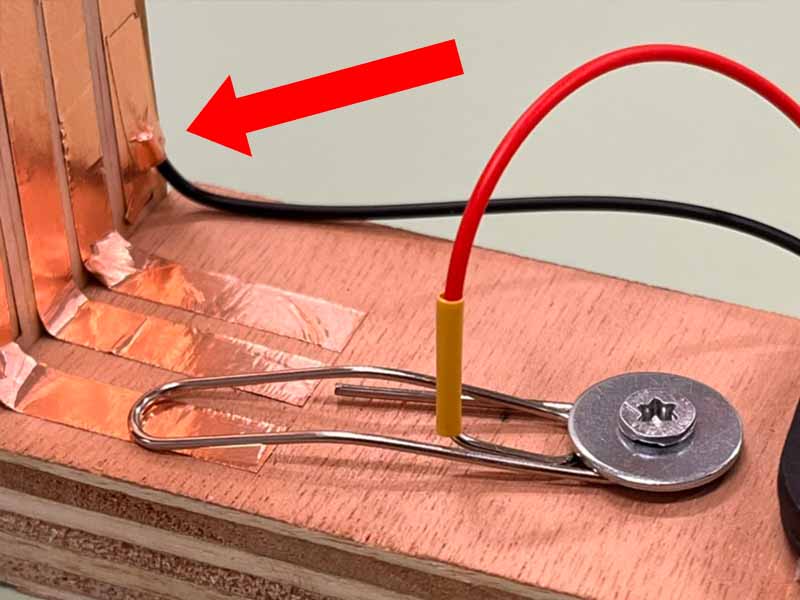
- Trim, strip and tape the black wire to the right piece of copper tape (when viewed from the back)
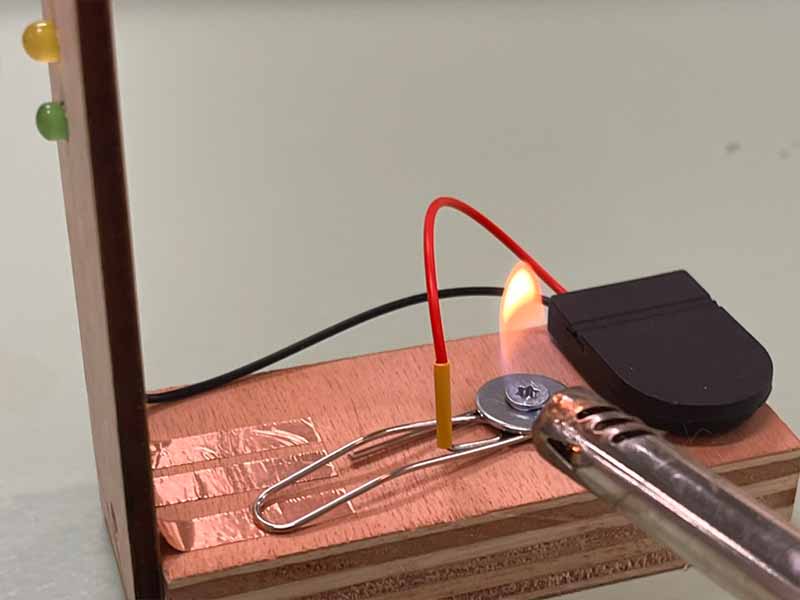
- Trim, strip and attach the red wire to the paperclip using some heat shrink tube.
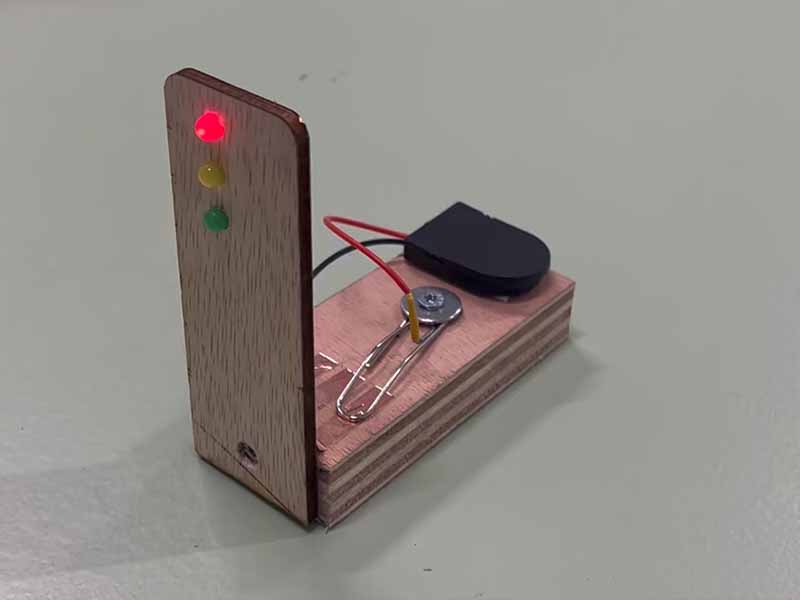
step 9 - Done!

- Place the battery. Make sure you have the right side up.
- You're all done! Move the paperclip to turn on the different lights.